
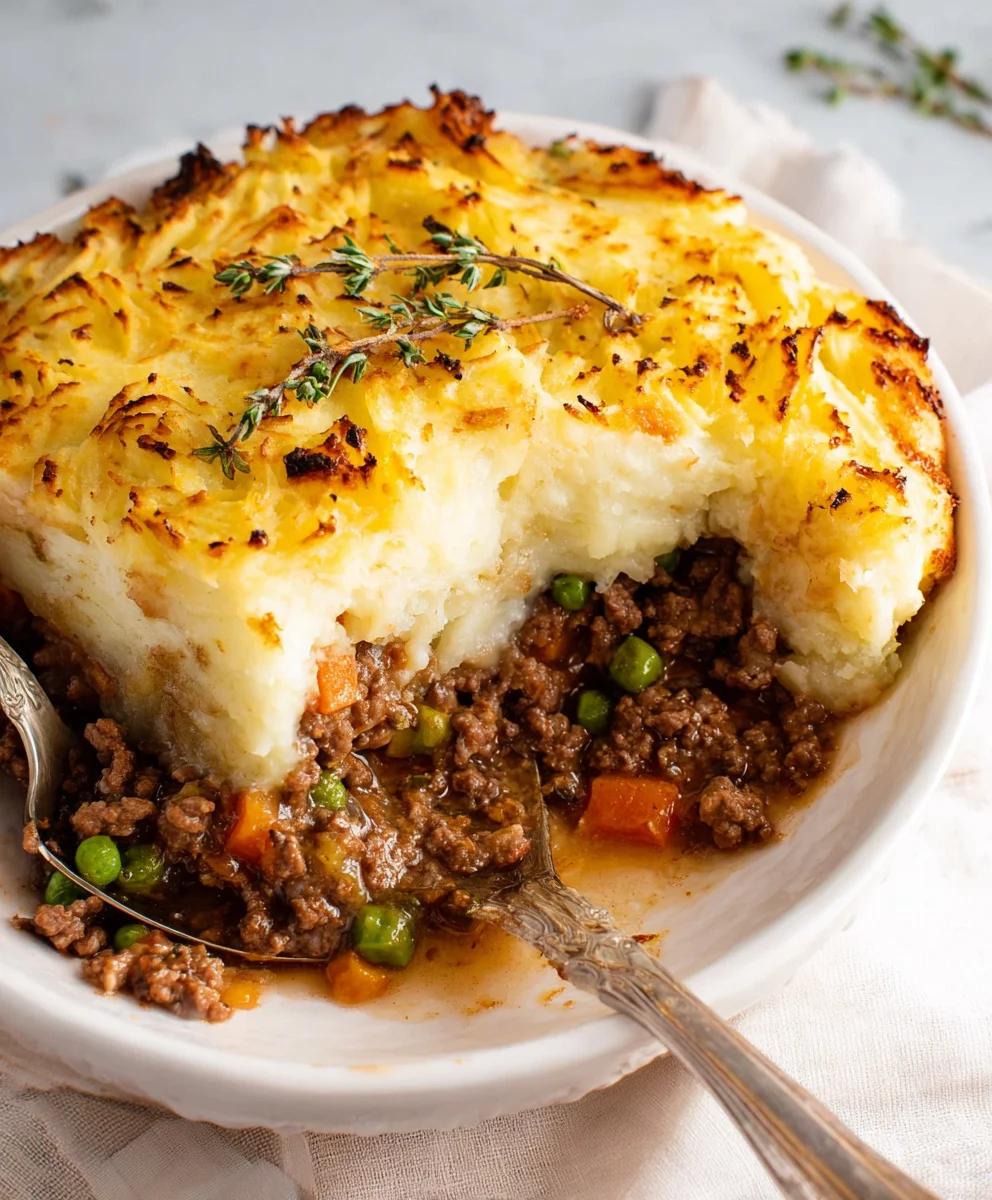
Easy Shepherd’s Pie isn’t just a meal; it’s a warm hug in a casserole dish, a comforting classic that evokes cozy evenings and satisfied sighs. What is it about this humble dish that captures hearts and stomachs so universally? Perhaps it’s the perfect marriage of tender, savory ground meat nestled beneath a fluffy cloud of mashed potatoes, baked to golden perfection. It’s the kind of food that feels both familiar and deeply satisfying, making it an instant crowd-pleaser for families and dinner parties alike. This particular recipe for Easy Shepherd’s Pie elevates the everyday with a few simple twists that bring out incredible depth of flavor without adding any fuss. Get ready to discover why this version is destined to become your new go-to for a truly delightful and unpretentious culinary experience that everyone will adore. Prepare yourself for pure comfort!
Ingredients:
- 1 Tablespoon olive oil
- ¾ cup yellow onion (finely diced)
- 1 rib celery (finely diced)
- 2 cloves garlic (minced)
- 1 lb. ground beef (85% lean recommended for good flavor and texture)
- 2 Tablespoons all-purpose flour
- 1 Tablespoon tomato paste
- ½ teaspoon dried thyme
- ½ cup chicken broth
- 1 cup brown gravy (homemade or good quality store-bought)
- Salt and freshly ground black pepper, to taste
- 1 cup frozen mixed vegetables (peas, carrots, corn, green beans are common)
- 3 cups prepared mashed potatoes (fluffy and well-seasoned)
Preparing the Savory Filling
This is where all the hearty flavors come together. We’ll build a rich, comforting base that makes the Easy Shepherd’s Pie truly shine.
Step 1: Sautéing the Aromatics
Begin extract by heating the 1 Tablespoon of olive oil in a large skillet or Dutch oven over medium heat. Once the oil is shimmering, add your finely diced ¾ cup yellow onion and the 1 rib of finely diced celery. We want to sweat these vegetables until they are softened and translucent, which usually takes about 5-7 minutes. This process coaxes out their natural sweetness. Don’t rush this step; tender, softened aromatics are key to a great flavor base. Stir them occasionally to prevent sticking. Once they’ve reached this stage, add the 2 cloves of minced garlic to the skillet. Cook for another minute until fragrant, being careful not to burn the garlic as it can turn bitter quickly.
Step 2: Browning the Ground Beef
Now it’s time to add the star of our filling: 1 lb. of ground beef. Break up the beef with your spoon and continue to cook over medium-high heat, stirring occasionally, until it’s nicely browned and no pink remains. This usually takes about 8-10 minutes. As the beef cooks, you’ll notice fat rendering. If you prefer a leaner filling, you can carefully drain off some of this excess fat, leaving a tablespoon or two for flavor. Once the beef is browned, use a slotted spoon to remove it from the skillet and set it aside on a plate lined with paper towels. This helps to remove any remaining excess grease.
Step 3: Creating the Rich Gravy Base
In the same skillet where you browned the beef, add the 2 Tablespoons of all-purpose flour directly to the rendered fat (if you drained too much, add a touch more olive oil). Whisk the flour into the fat and cook for about 1-2 minutes, stirring constantly. This is called making a roux, and it helps to thicken our gravy and cook out the raw flour taste. Next, stir in the 1 Tablespoon of tomato paste and cook for another minute, until it darkens slightly. This intensifies the tomato flavor. Now, gradually whisk in the ½ cup of chicken broth, making sure to scrape up any browned bits from the bottom of the pan – these are packed with flavor! Then, pour in the 1 cup of brown gravy. Bring the mixture to a simmer, stirring until it’s smootgin extractnd begins to thicken.
Step 4: Simmering and Seasoning the Filling
Return the browned ground beef to the skillet with the gravy mixture. Add the ½ teaspoon of dried thyme. Season generously with salt and freshly ground black pepper to your liking. Remember that the gravy itself might be seasoned, so taste as you go. Stir everything together well, ensuring the beef is evenly coated. Reduce the heat to low, cover the skillet, and let the filling simmer for at least 10-15 minutes. This allows the flavors to meld together beautifully and the sauce to thicken further. If the mixture becomes too thick, you can add a splash more chicken broth or water. Stir in the 1 cup of frozen mixed vegetables during the last 5 minutes of simmering. These vegetables add a lovely pop of color and texture without becoming mushy.
Assembling and Baking the Easy Shepherd’s Pie
Now that our delicious filling is ready, it’s time to bring it all together and get that golden-brown crust.
Step 5: Layering and Topping
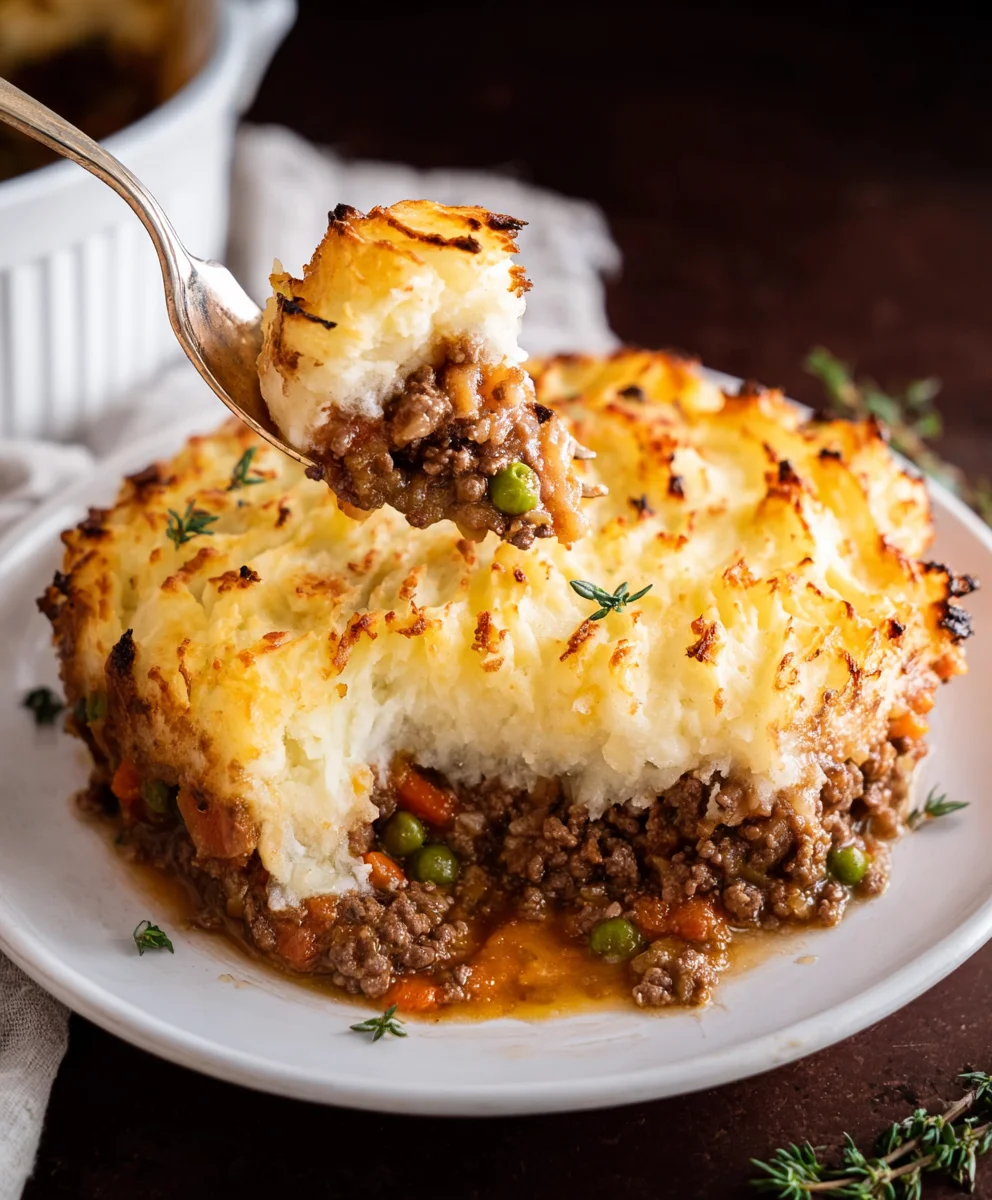
Preheat your oven to 375°F (190°C). Pour the prepared ground beef and vegetable filling evenly into the bottom of a 9×13 inch baking dish or an equivnon-alcoholic alent oven-safe dish. Ensure the filling is spread out to create a consistent layer. Next, spoon the 3 cups of prepared mashed potatoes over the top of the filling. You can spread it evenly with a spatula for a smooth finish, or create some rustic peaks and swirls with the back of a spoon – these textured areas will crisp up nicely in the oven. If you like, you can brush the top of the mashed potatoes with a little melted butter or milk for an extra golden sheen. For a beautiful golden-brown crust, you can even use a fork to gently create some ridges on the potato topping; these will brown and crisp up invitingly in the oven.
Step 6: Baking to Golden Perfection
Place the assembled Shepherd’s Pie into the preheated oven. Bake for 25-30 minutes, or until the potato topping is golden brown and the filling is bubbling around the edges. Keep an eye on it, especially towards the end, to prevent the potato topping from becoming too dark. If the topping is browning too quickly but the filling isn’t hot enough, you can loosely tent the dish with aluminum foil. Once baked, carefully remove the dish from the oven and let it rest for about 10 minutes before serving. This allows the filling to settle slightly, making it easier to serve neat portions and prevents the molten filling from burning your mouth.
Conclusion:
And there you have it – a truly delightful and straightforward recipe for Easy Shepherd’s Pie! We’ve walked through each step, from crafting the savory minced lamb filling to topping it with a creamy, golden mashed potato crust. This dish is a comfort food classic for a reason, and now you can easily bring its heartwarming goodness to your own table. Don’t be afraid to get creative! This Easy Shepherd’s Pie is wonderfully versatile.
To serve, I love pairing it with a simple green salad to add a fresh contrast, or perhaps some steamed peas and carrots for an extra burst of color and nutrition. For variations, feel free to swap out the lamb for beef to create a “Cottage Pie,” or even try a vegetarian version by using lentils and mushrooms in place of the meat. Get the kids involved in mashing the potatoes – it’s a fun activity for everyone! I truly hope you enjoy making and sharing this wonderful Easy Shepherd’s Pie with your loved ones. Happy cooking!
Frequently Asked Questions:
Can I make this Easy Shepherd’s Pie ahead of time?
Absolutely! You can prepare the entire Easy Shepherd’s Pie, from the filling to the mashed potato topping, and refrigerate it for up to 2 days. When you’re ready to bake, simply take it out of the refrigerator about 30 minutes before baking to allow it to come closer to room temperature, then bake as directed, possibly adding a few extra minutes to ensure it’s heated through.
What kind of potatoes are best for the topping?
For the creamiest and most mashable topping for your Easy Shepherd’s Pie, I recommend using starchy potatoes like Russets or Yukon Golds. These varieties break down beautifully when boiled and absorb the milk and butter for a wonderfully smooth texture. Waxy potatoes can sometimes result in a gluey mashed topping.
Easy Beef Shepherd’s Pie Recipe-Comfort Food Favorite
A hearty and comforting classic, this Easy Beef Shepherd’s Pie features a rich ground beef and vegetable filling topped with fluffy mashed potatoes.
Ingredients
-
1 Tablespoon olive oil
-
¾ cup yellow onion (finely diced)
-
1 rib celery (finely diced)
-
2 cloves garlic (minced)
-
1 lb. ground beef
-
2 Tablespoons all-purpose flour
-
1 Tablespoon tomato paste
-
½ teaspoon dried thyme
-
½ cup chicken broth
-
1 cup brown gravy
-
Salt and freshly ground black pepper, to taste
-
1 cup frozen mixed vegetables
-
3 cups prepared mashed potatoes
Instructions
-
Step 1
Heat olive oil in a large skillet or Dutch oven over medium heat. Add diced onion and celery, and sauté until softened (5-7 minutes). Add minced garlic and cook for 1 minute more until fragrant. -
Step 2
Add ground beef to the skillet. Cook over medium-high heat, stirring occasionally, until browned and no pink remains (8-10 minutes). Drain excess fat, leaving a tablespoon or two. Remove beef from skillet and set aside. -
Step 3
In the same skillet, whisk flour into the rendered fat and cook for 1-2 minutes to make a roux. Stir in tomato paste and cook for another minute. Gradually whisk in chicken broth, scraping up browned bits. Pour in brown gravy and bring to a simmer until thickened. -
Step 4
Return browned beef to the skillet. Add dried thyme, salt, and pepper to taste. Stir to combine. Reduce heat to low, cover, and simmer for 10-15 minutes. Stir in frozen mixed vegetables during the last 5 minutes of simmering. -
Step 5
Preheat oven to 375°F (190°C). Pour the beef filling into a 9×13 inch baking dish. Spoon the mashed potatoes evenly over the filling. Create ridges on top with a fork if desired. -
Step 6
Bake for 25-30 minutes, or until the potato topping is golden brown and the filling is bubbling. Let rest for 10 minutes before serving.
Important Information
Nutrition Facts (Per Serving)
It is important to consider this information as approximate and not to use it as definitive health advice.
Allergy Information
Please check ingredients for potential allergens and consult a health professional if in doubt.


Leave a Comment