
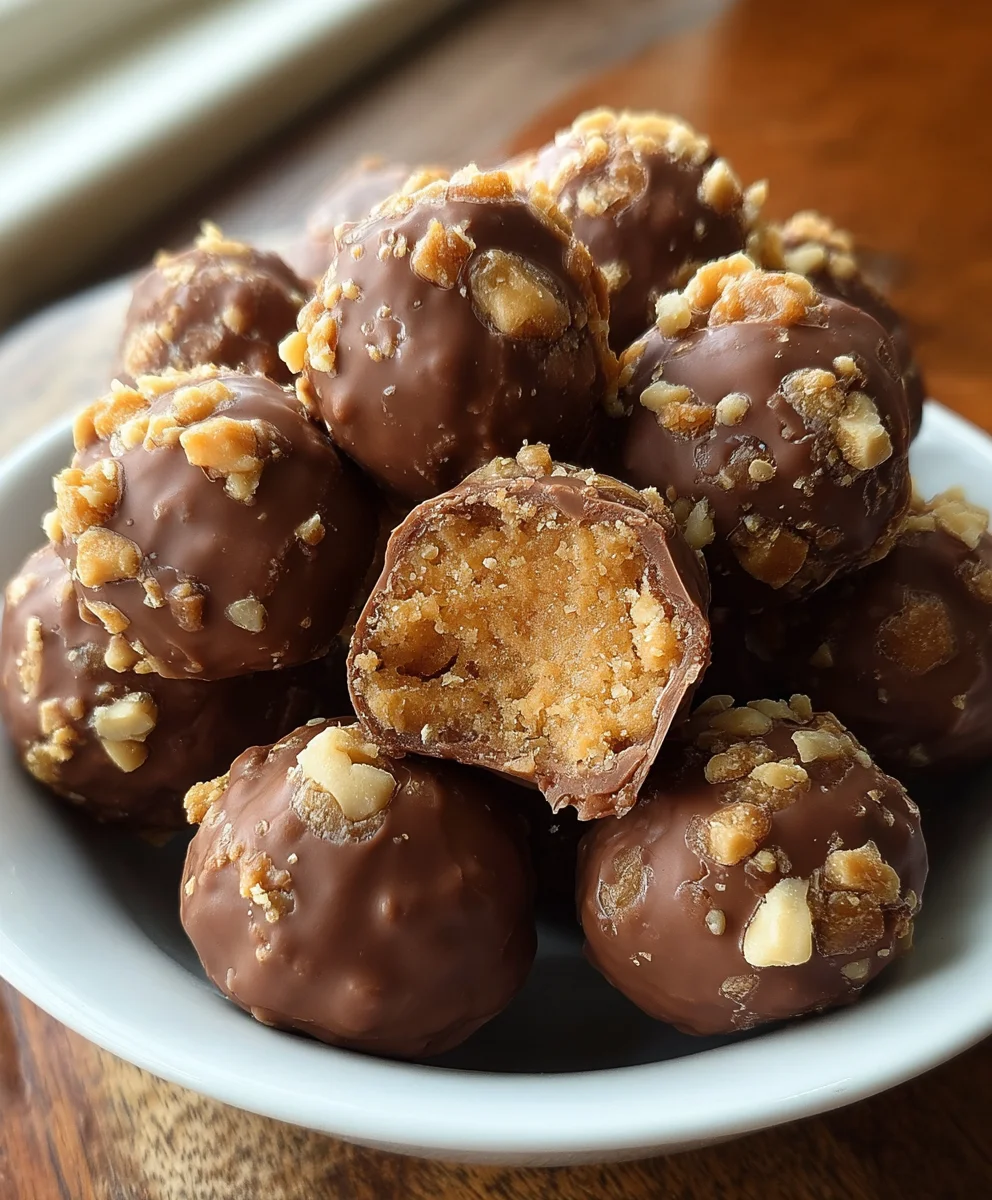
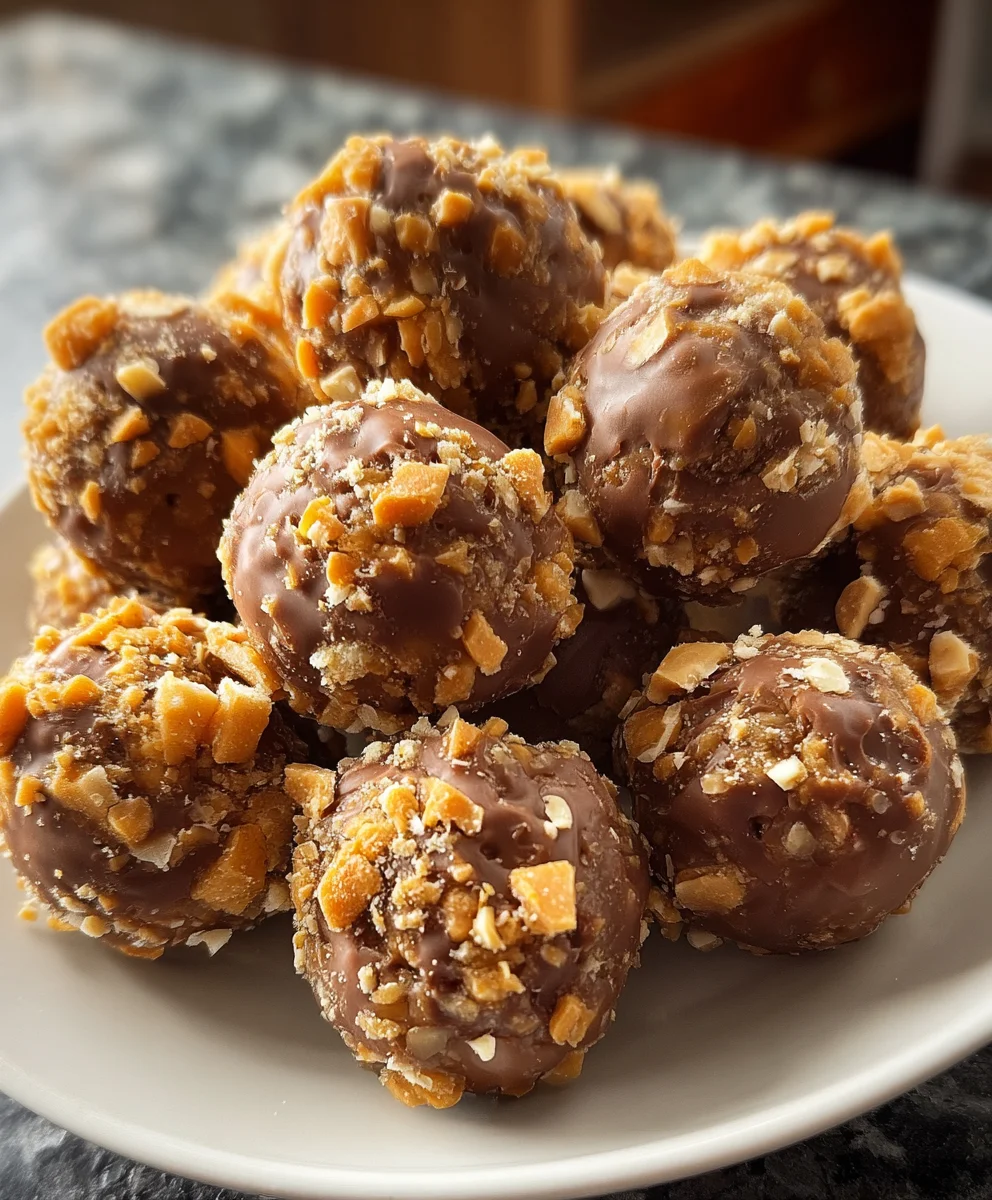
Butterfinger Balls are the ultimate sweet and salty sensation, a delightful explosion of flavor and texture that has captivated taste buds for years. If you’ve ever craved a treat that perfectly balances crunchy, peanut-buttery goodness with a hint of decadent chocolate, then you’re in for a real delight. What makes these Butterfinger Balls so incredibly special? It’s that unmistakable, shatteringly crisp Butterfinger candy bar, expertly transformed into bite-sized morsels of pure joy. We’re not just talking about a simple confection; these are a nostalgic trip back to childhood for many, a reliable crowd-pleaser at parties, and an irresistible pick-me-up on any given day. Get ready to experience the magic of these beloved Butterfinger Balls – they’re surprisingly easy to make and guaranteed to disappear in a flash!
Ingredients:
- 4 tablespoons softened butter (½ stick)
- 1 teaspoon vanilla extract
- 8 ounces chocolate bark or chocolate chips
- ½ cup Butterfinger bars (crushed)
- 1 cup powdered sugar
- 1 cup peanut butter (avoid all-natural varieties)
- ¾ cup crumbs from graham crackers
- Optional garnishes: additional crushed Butterfinger bars (festive sprinkles, or coarse sea salt)
Preparing the Butterfinger Balls
Step 1: Creaming the Base
First, we need to create a rich and creamy base for our Butterfinger Balls. In a medium mixing bowl, combine the 4 tablespoons of softened butter and 1 cup of peanut butter. Using an electric mixer or a sturdy whisk, cream these two ingredients together until they are perfectly smooth and well combined. You want a uniform texture, free of any butter lumps. This step is crucial for ensuring a good mouthfeel and proper binding of our ingredients later on. Scrape down the sides of the bowl a few times to make sure everything is incorporated. Next, add the 1 teaspoon of vanilla extract and mix it in thoroughly. The vanilla will add a lovely aromatic depth to our sweet treats.
Step 2: Incorporating Dry Ingredients
Once the butter and peanut butter are beautifully combined, it’s time to introduce the dry ingredients. Gradually add the 1 cup of powdered sugar and the ¾ cup of graham cracker crumbs to the wet mixture. It’s best to add the powdered sugar in two or three additions, mixing well after each. This helps prevent a cloud of sugar dust from erupting and ensures it gets fully incorporated without making the mixture too stiff. The graham cracker crumbs will add a subtle crunch and a hint of spice that complements the other flavors. Mix everything until it forms a cohesive dough. This dough should be firm enough to roll into balls, but still pliable. If it feels a bit too dry, you can add another tablespoon of peanut butter. If it feels too sticky, a tablespoon more of powdered sugar can help.
Step 3: Adding the Star Ingredient – Butterfinger!
Now for the most exciting part: adding the crushed Butterfinger bars! Gently fold in the ½ cup of crushed Butterfinger bars into the dough. Be sure to reserve a little extra crushed Butterfinger for our optional garnish later, if you plan to use it. You want to distribute the Butterfinger pieces evenly throughout the dough, so each bite offers that signature crispety, crunchety goodness. Avoid overmixing at this stage, as we want to keep those delightful Butterfinger chunks intact. This is what truly makes these Butterfinger Balls special.
Step 4: Shaping and Chilling the Balls
With our delicious dough ready, it’s time to roll! Take small portions of the mixture and roll them between your palms to form bite-sized balls, about 1 inch in diameter. Aim for consistency in size so they bake (or set, in this case) evenly. As you roll them, place them on a baking sheet lined with parchment paper. Don’t worry if they aren’t perfectly round; a rustic charm is part of their appeal. Once all the dough is rolled into balls, place the baking sheet in the refrigerator for at least 30 minutes. This chilling step is important as it helps the balls firm up, making them easier to handle for the next step.
Step 5: The Chocolate Coating
While the balls are chilling, prepare your chocolate coating. In a microwave-safe bowl or a double boiler, melt the 8 ounces of chocolate bark or chocolate chips. If using a microwave, heat in 30-second intervals, stirring well after each, until smooth and fully melted. Be careful not to overheat, as chocolate can seize. If using a double boiler, stir constantly until melted and smooth. Once melted, remove from heat. Take the chilled Butterfinger Balls out of the refrigerator. Using a fork or a toothpick, dip each ball into the melted chocolate, ensuring it’s fully coated. Let any excess chocolate drip back into the bowl. Place the chocolate-dipped balls back onto the parchment-lined baking sheet.
Step 6: Garnishing and Setting
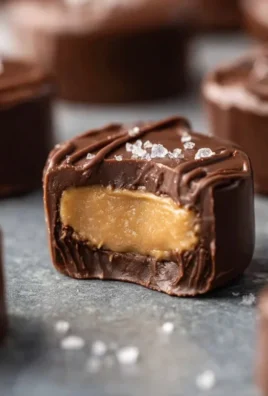
This is where you can get creative with your Butterfinger Balls! While the chocolate coating is still wet, sprinkle them with your desired garnishes. This is the perfect time to add the reserved crushed Butterfinger bars for an extra Butterfinger punch. Festive sprinkles can add a pop of color, and a pinch of coarse sea salt can wonderfully balance the sweetness. Once garnished, place the baking sheet back into the refrigerator for at least another 30-60 minutes, or until the chocolate has completely set. You can also freeze them for about 15-20 minutes if you’re short on time and want them to set quickly. Once the chocolate is firm, your delicious Butterfinger Balls are ready to be enjoyed! Store any leftovers in an airtight container in the refrigerator.
Conclusion:
And there you have it – your ultimate guide to crafting delicious Butterfinger Balls! We’ve walked through each step, from selecting the perfect ingredients to achieving that irresistible chewy center and crunchy coating. These delightful treats are a guaranteed crowd-pleaser, perfect for bake sales, holiday gatherings, or simply as a special indulgence. Don’t be afraid to experiment with the serving suggestions; a dusting of powdered sugar, a drizzle of chocolate, or a sprinkle of extra crushed Butterfinger candy can elevate these already amazing Butterfinger Balls to new heights.
Remember, the beauty of this recipe lies in its adaptability. Feel free to explore variations! Perhaps add a pinch of sea salt to the dough for a sweet and salty contrast, or mix in some mini chocolate chips for an extra chocolatey punch. The possibilities are endless. So go forth, embrace your inner baker, and create your own batch of these fantastic Butterfinger Balls. I’m confident you’ll be delighted with the results and the joy they bring!
Frequently Asked Questions about Butterfinger Balls:
Q: Can I make Butterfinger Balls ahead of time?
Absolutely! Butterfinger Balls can be stored in an airtight container at room temperature for up to 3-4 days. For longer storage, they can be frozen for up to 2-3 months. If frozen, allow them to thaw at room temperature before enjoying.
Q: What if I don’t have Butterfinger candy bars? Can I substitute them?
While Butterfinger candy bars are key to the unique flavor of these Butterfinger Balls, you can experiment with other crunchy, peanut-buttery candies. However, the texture and taste will be different. Crushed peanut butter cups or other similar bars might offer a decent substitute, but the signature Butterfinger experience will be missed.
Easy Butterfinger Balls – Delicious No-Bake Treat
A delightful no-bake treat featuring the irresistible flavor of Butterfinger bars, mixed into a creamy peanut butter base and coated in chocolate.
Ingredients
-
4 tablespoons softened butter (½ stick)
-
1 teaspoon vanilla extract
-
8 ounces chocolate bark or chocolate chips
-
½ cup Butterfinger bars (crushed)
-
1 cup powdered sugar
-
1 cup peanut butter (avoid all-natural varieties)
-
¾ cup crumbs from graham crackers
-
Optional garnishes: additional crushed Butterfinger bars, festive sprinkles, or coarse sea salt
Instructions
-
Step 1
In a medium mixing bowl, cream together softened butter and peanut butter until smooth. Mix in vanilla extract. -
Step 2
Gradually add powdered sugar and graham cracker crumbs to the wet mixture, mixing until a cohesive dough forms. Adjust consistency with more peanut butter or powdered sugar if needed. -
Step 3
Gently fold in the crushed Butterfinger bars, distributing them evenly throughout the dough. -
Step 4
Roll the dough into bite-sized balls (about 1 inch in diameter) and place them on a parchment-lined baking sheet. Chill in the refrigerator for at least 30 minutes. -
Step 5
Melt the chocolate bark or chips. Dip each chilled ball into the melted chocolate, allowing excess to drip off, and return to the parchment-lined baking sheet. -
Step 6
While the chocolate is still wet, sprinkle with optional garnishes like additional crushed Butterfinger, sprinkles, or sea salt. Refrigerate for another 30-60 minutes, or until the chocolate has completely set.
Important Information
Nutrition Facts (Per Serving)
It is important to consider this information as approximate and not to use it as definitive health advice.
Allergy Information
Please check ingredients for potential allergens and consult a health professional if in doubt.
Leave a Comment