
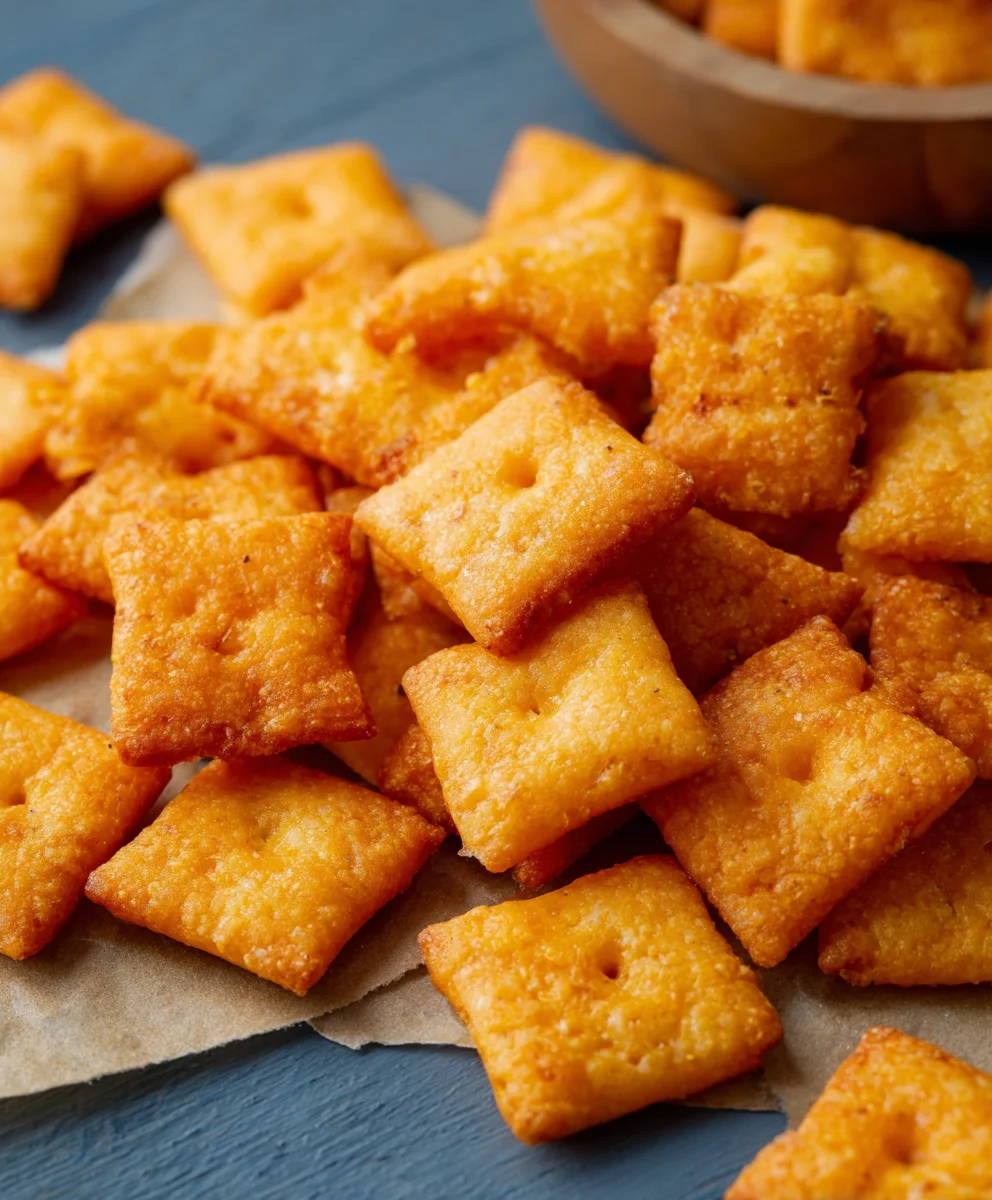
Homemade Cheez Its Recipe Cheddar Cheese Crackers are more than just a snack; they are a gateway to pure, unadulterated joy. Remember that satisfying crunch, the intensely cheesy flavor that lingers just long enough to make you crave another? For many of us, these iconic little squares are woven into the fabric of childhood memories, a comfort food that never disappoints. What makes this Homemade Cheez Its Recipe Cheddar Cheese Crackers so incredibly special? It’s the ability to recreate that beloved taste and texture in your own kitchen, with ingredients you can trust and a level of cheesy goodness that often surpasses the store-bought version. We’re talking about a simple alchemy of butter, flour, and heaps of sharp cheddar that transforms into impossibly delicious crackers, perfect for lunchboxes, movie nights, or just a spontaneous afternoon indulgence. Get ready to ditch the boxed variety for good!

Ingredients:
- 2 cups all-purpose flour
- 1 teaspoon baking powder
- 1/2 teaspoon salt
- 1/4 teaspoon cayenne pepper (optional, for a little heat)
- 1 cup (2 sticks) cold unsalted butter, cut into small cubes
- 2 cups shredded sharp cheddar cheese (about 8 ounces)
- 1/4 cup milk
- 1 large egg
- 1 teaspoon Worcestershire sauce
Preparing the Dough
Step 1: Combine Dry Ingredients
In a large mixing bowl, whisk together the all-purpose flour, baking powder, salt, and cayenne pepper (if you’re using it for a subtle kick). The baking powder will help our crackers achieve a slight lift, preventing them from being too dense. The salt enhances the overall flavor, and the cayenne pepper adds a delightful warmth that complements the sharp cheddar beautifully. Ensure these are well combined to distribute the leavening agent evenly.
Step 2: Cut in the Butter
Add the cold, cubed unsalted butter to the dry ingredients. You can do this using a pastry blender, two forks, or even your fingertips. The goal is to cut the butter into the flour until the mixture resembles coarse crum extractbs, with some pea-sized pieces of butter remaining. Keeping the butter cold is crucial for creating flaky crackers. Those little pockets of butter will melt during baking, leaving behind airy spaces that give the crackers their signature texture. Don’t overwork the dough at this stage; we want distinct pieces of butter.
Step 3: Incorporate the Cheese
Add the shredded sharp cheddar cheese to the bowl. Gently toss it with the flour-butter mixture to corum extractthe crumbs. Using sharp cheddar is key here, as it provides a robust, tangy flavor that is characteristic of authentic cheese crackers. Make sure the cheese is evenly distributed; this will ensure cheesy goodness in every bite.
Forming and Baking the Crackers
Step 4: Create the Wet Mixture and Combine
In a separate small bowl, whisk together the milk, large egg, and Worcestershire sauce. The egg acts as a binder, holding everything together, while the milk provides the necessary moisture to form a cohesive dough. The Worcestershire sauce adds a complex layer of umami flavor that really elevates the cheese taste. Pour this wet mixture over the flour, butter, and cheese combination.
Now, gently mix everything until a shaggy dough begin extracts to form. Be careful not to overmix. You can use a spatula or your hands for this. The dough wirum extractbe somewhat crumbly at first, but as you bring it together, it should start to hold its shape. If the dough seems too dry and won’t come together, you can add an extra teaspoon of milk, but do so sparingly. The aim is a dough that’s workable but not sticky.
Step 5: Chill and Roll the Dough
Turn the dough out onto a lightly floured surface. Gently knead it a few times, just enough to bring it together into a cohesive ball. Flatten the ball into a disk, wrap it tightly in plastic wrap, and refrigerate for at least 30 minutes. This chilling period is essential. It allows the gluten in the flour to relax, making the dough easier to roll and also firms up the butter, which will help with texture during baking.
Once chilled, unwrap the dough and place it back on your lightly floured surface. Roll the dough out to about 1/8-inch thickness. This thickness is important for achieving crispy, crunchy crackers. If the dough is too thick, they’ll be more like biscuits; if too thin, they might burn easily. You can use a ruler or your eye to check for consistency.
Step 6: Cut and Prepare for Baking
Now comes the fun part! You can use a knife to cut the dough into squares, or if you’re feeling fancy, use a small square cookie cutter for that classic Cheez-It shape. Arrange the cut crackers on baking sheets lined with parchment paper. Leave a little space between them, as they might spread slightly during baking. For an extra touch, you can lightly sprinkle the tops with a bit of coarse sea salt or even some additional shredded cheddar cheese. This step is all about personalization and making them uniquely yours.
Step 7: Bake to Golden Perfection
Preheat your oven to 375°F (190°C). Bake the crackers for 12-15 minutes, or until they are golden brown around the edges and firm to the touch. Keep a close eye on them, especially towards the end of the baking time, as crackers can go from perfectly baked to burnt very quickly. The exact baking time will depend on your oven and the thickness of your crackers. Once baked, remove them from the oven and let them cool on the baking sheets for a few minutes before transferring them to a wire rack to cool completely. This allows them to crisp up fully. Enjoy your delicious homemade cheddar cheese crackers!
Conclusion:
We’ve reached the end of our delicious journey creating the Homemade Cheez Its Recipe Cheddar Cheese Crackers! I hope you’ve enjoyed the process as much as I have. This recipe delivers that satisfyingly cheesy, crunchy, and undeniably addictive snack that we all know and love. The beauty of making them from scratch is the control you have over the ingredients and the incredibly fresh flavor you achieve. Once you’ve mastered this basic recipe, you’ll be whipping up batches for every movie night, lunchbox, or spontaneous craving.
These Homemade Cheez Its Recipe Cheddar Cheese Crackers are fantastic on their own, of course. But they also pair wonderfully with a variety of dips, like your favorite hummus, a creamy ranch, or even a spicy salsa for a flavor explosion. For a bit of fun, consider crum extractbling them over a salad for an extra cheesy crunch or using them as a base for mini quiches. Don’t be afraid to experiment! Try adding a pinch of smoked paprika for a smoky kick, a dash of garlic powder for extra savory notes, or even a hint of cayenne pepper if you like a little heat. The possibilities are truly endless with this versatile recipe.
Now, go forth and create your own cheesy masterpieces! You’ve got this!
Frequently Asked Questions:
Q1: Can I use a different type of cheese for these Homemade Cheez Its Recipe Cheddar Cheese Crackers?
Absolutely! While sharp cheddar is classic and provides that iconic flavor, feel free to experiment. Monterey Jack, Colby, Gruyere, or even a blend of cheeses can be used. Just be sure to shred them finely for the best texture. Keep in mind that different cheeses have varying fat content, which might slightly affect the final crispiness.
Q2: My crackers are a little too soft. What can I do to make them crispier?
Several factors can influence crispiness. Ensure your oven temperature is accurate and that you’re not overcrowding the baking sheet. Baking them for a few extra minutes at a slightly lower temperature can also help dry them out and achieve that perfect crunch. Additionally, make sure your dough isn’t too wet; if it feels sticky, a tiny bit more flour might be needed. Proper cooling on a wire rack is also essential for continued crisping.
Easy Homemade Cheddar Cheese Crackers-Cheez Its
Whip up a batch of irresistible homemade cheddar cheese crackers that taste just like your favorite store-bought snack. Perfect for munching!
Ingredients
-
2 cups all-purpose flour
-
1 teaspoon baking powder
-
1/2 teaspoon salt
-
1/4 teaspoon cayenne pepper (optional)
-
1 cup (2 sticks) cold unsalted butter, cut into small cubes
-
2 cups shredded sharp cheddar cheese
-
1/4 cup milk
-
1 large egg
-
1 teaspoon Worcestershire sauce
Instructions
-
Step 1
Combine dry ingredients: In a large mixing bowl, whisk together the all-purpose flour, baking powder, salt, and cayenne pepper (if using). Ensure these are well combined to distribute the leavening agent evenly. -
Step 2
Cut in the butter: Add the cold, cubed unsalted butter to the dry ingredients. Use a pastry blender, two forks, or your fingertips to cut the butter into the flour until the mixture resembles coarse crumbs with some pea-sized pieces of butter remaining. Keep the butter cold for flaky crackers. -
Step 3
Incorporate the cheese: Add the shredded sharp cheddar cheese to the bowl and gently toss it with the flour-butter mixture to coat the crumbs. Ensure the cheese is evenly distributed for cheesy goodness in every bite. -
Step 4
Create the wet mixture and combine: In a separate small bowl, whisk together the milk, large egg, and Worcestershire sauce. Pour this wet mixture over the flour, butter, and cheese combination. Gently mix until a shaggy dough begins to form. Be careful not to overmix. If the dough seems too dry, add an extra teaspoon of milk sparingly. -
Step 5
Chill and roll the dough: Turn the dough out onto a lightly floured surface, knead a few times to bring it together, and flatten into a disk. Wrap tightly in plastic wrap and refrigerate for at least 30 minutes. Once chilled, unwrap and roll the dough out to about 1/8-inch thickness on a lightly floured surface. -
Step 6
Cut and prepare for baking: Cut the dough into squares using a knife or a small square cookie cutter. Arrange the cut crackers on baking sheets lined with parchment paper, leaving a little space between them. Lightly sprinkle the tops with coarse sea salt or additional shredded cheddar if desired. -
Step 7
Bake to golden perfection: Preheat your oven to 375°F (190°C). Bake the crackers for 12-15 minutes, or until they are golden brown around the edges and firm to the touch. Keep a close eye on them. Remove from the oven and let cool on baking sheets for a few minutes before transferring to a wire rack to cool completely.
Important Information
Nutrition Facts (Per Serving)
It is important to consider this information as approximate and not to use it as definitive health advice.
Allergy Information
Please check ingredients for potential allergens and consult a health professional if in doubt.


Leave a Comment