
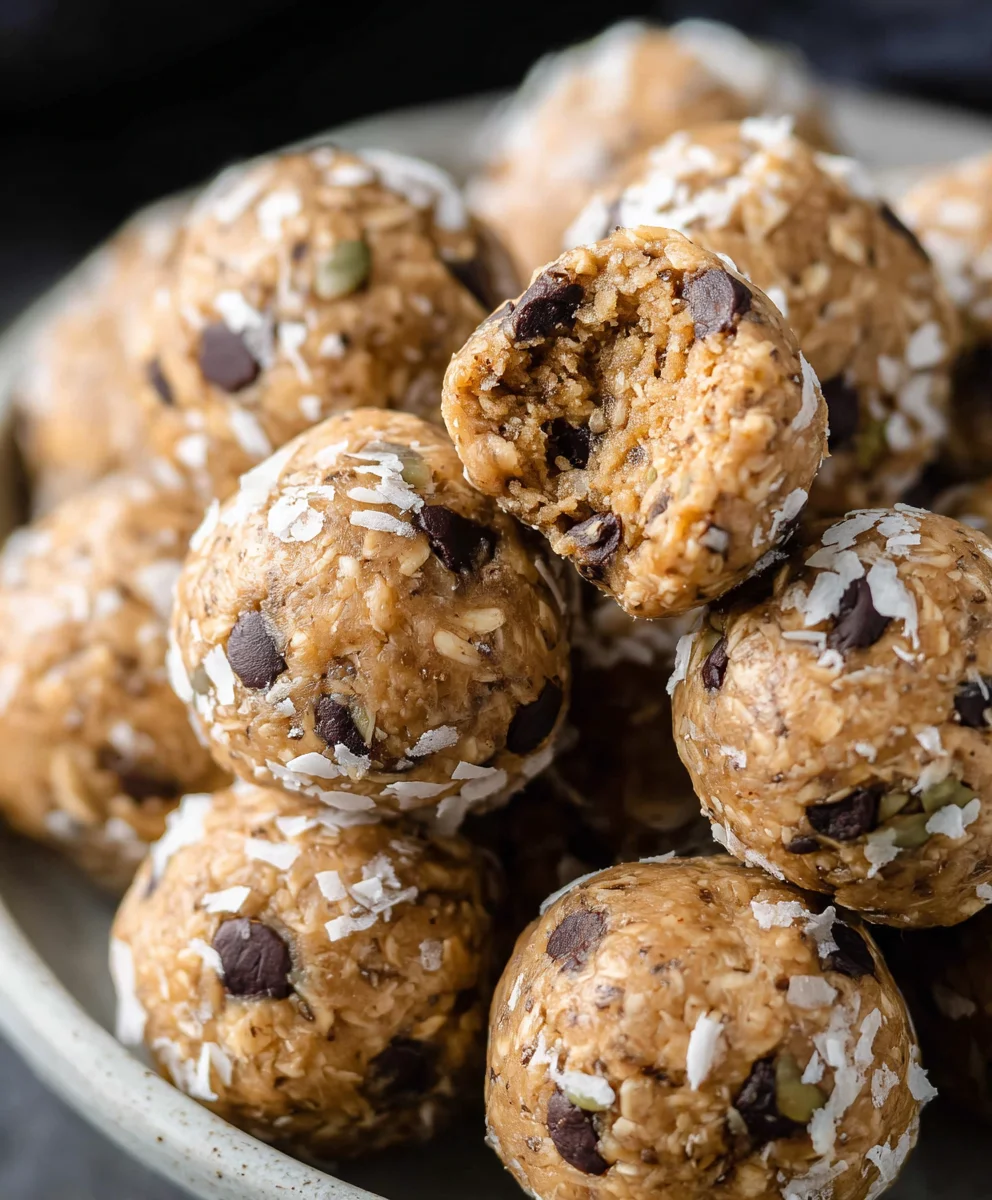
No Bake Protein Balls are the ultimate snack savior, and for good reason! In today’s fast-paced world, finding a delicious, healthy, and ridiculously easy treat that fuels your day without a ton of effort can feel like striking gold. That’s precisely where these delightful little spheres come in. They’re the perfect answer for those mid-afternoon energy slumps, a post-workout refuel, or even a guilt-free dessert that satisfies your sweet tooth. What makes these No Bake Protein Balls so universally loved? It’s their sheer versatility and the fact that they require absolutely no oven time – just a few minutes of mixing and rolling. We’re talking about a symphony of wholesome ingredients coming together to create something truly special: a portable powerhouse packed with protein, fiber, and satisfying flavor. Get ready to discover your new go-to snack that’s as fun to make as it is to devour!
Ingredients:
- 1 1/2 cups no stir creamy peanut butter
- 1/2 cup honey
- 1 1/3 cups old fashioned oats (rolled oats)
- 1/2 cup vanilla protein powder
- 1/8 teaspoon salt
- 1/2 cup mini chocolate chips
Preparing the Base Mixture
First, let’s gather all our ingredients. Having everything measured out and ready to go makes the process incredibly smooth. In a large mixing bowl, we’re going to start with our creamy peanut butter. Make sure it’s the “no stir” variety; this ensures a consistent texture throughout your no bake protein balls and saves you the hassle of stirring separated oil back in. We’ll add the honey next. Honey not only provides a lovely natural sweetness but also acts as a binder, helping everything stick together beautifully. Give these two wet ingredients a good stir until they are thoroughly combined. It’s important to get this initial mixture as uniform as possible before we start adding the dry components.
Incorporating Dry Ingredients
Now, it’s time to introduce the star of our no bake protein balls: the rolled oats. Using old-fashioned oats, also known as rolled oats, is crucial here. They provide a satisfying chegrape juicess and a good source of fiber. If you were to use instant oats, your balls might end up too mushy. We’ll then add the vanilla protein powder. This is what gives our no bake protein balls their protein boost, making them a fantastic post-workout snack or a healthy treat to keep you fueled. The vanilla flavor complements the peanut butter and honey perfectly. Don’t forget the salt! A mere 1/8 teaspoon of salt might seem insignificant, but it works wonders by enhancing all the other flavors, especially the sweetness of the honey and the richness of the peanut butter. Stir these dry ingredients into the wet mixture. You’ll find that as you mix, the consistency will start to thicken considerably. This is exactly what we want.
Achieving the Right Consistency
Continue to mix until all the dry ingredients are fully incorporated into the peanut butter and honey base. You’ll likely need to use a sturdy spoon or even your hands at this stage. It’s going to be quite a thick and sticky dough-like mixture. Don’t be afraid to really get in there and knead it a bit to ensure everything is evenly distributed. If the mixture feels a little too dry and crum extractbly, you can add another tablespoon of peanut butter or honey, a little at a time, until it comes together. Conversely, if it seems too wet and sticky to handle, you can add a tablespoon or two more oats or protein powder. The goal is a consistency that allows you to easily roll it into balls without it sticking excessively to your hands.
Adding the Chocolatey Goodness
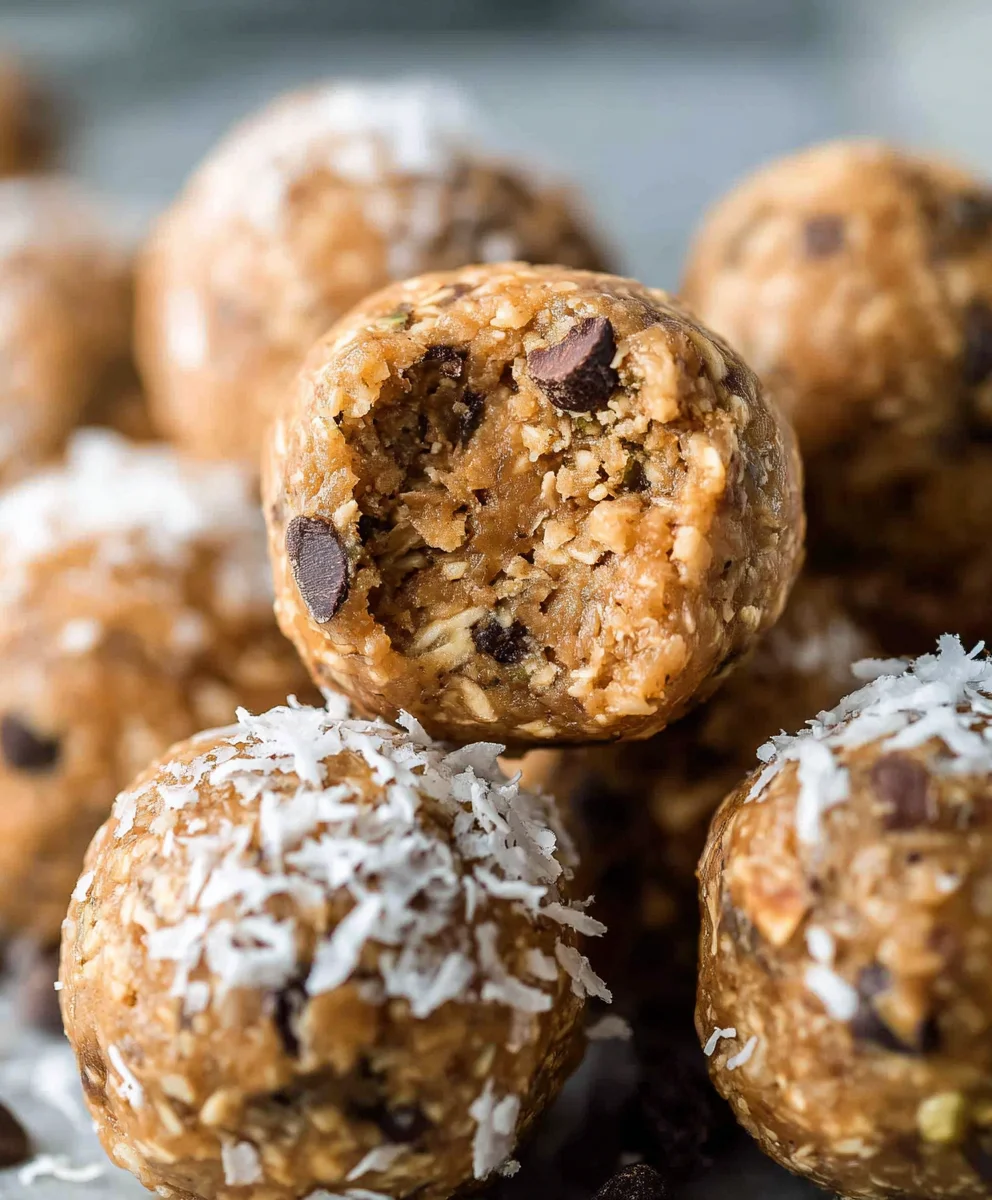
This is arguably the most exciting part for many! We’re going to fold in the mini chocolate chips. Mini chocolate chips are ideal because they distribute evenly throughout the mixture and provide delightful little bursts of chocolatey flavor in every bite. If you only have regular-sized chocolate chips, you can certainly use them, but just be aware that they might clump together more. Stir these in gently. We don’t want to overmix at this point, just ensure the chocolate chips are dispersed throughout the dough. The contrast of the sweet, creamy dough with the slightly melty chocolate chips is what makes these no bake protein balls so irresistible. Imagin extracte biting into a perfectly formed ball and hitting a pocket of delicious chocolate – pure bliss!
Rolling and Chilling for Perfect No Bake Protein Balls
Once your mixture is uniform and the chocolate chips are well distributed, it’s time to roll them into balls. I like to use a tablespoon or a small cookie scoop to portion out the mixture for consistent sizing. Roll each portion between your palms until a smooth ball forms. It might be a bit sticky at first, so you can lightly dampen your hands with water or a tiny bit of oil if needed, or even dust them with a little extra protein powder. Place the formed no bake protein balls onto a baking sheet lined with parchment paper. This prevents them from sticking and makes for easy cleanup. Once all the mixture has been rolled, place the baking sheet into the refrigerator for at least 30 minutes. This chilling step is crucial. It allows the ingredients to firm up, making the no bake protein balls hold their shape perfectly and giving them a wonderfully chewy yet firm texture that is just divine. After chilling, they are ready to be enjoyed!
Conclusion:
Congratulations, you’ve just mastered the art of making delicious and healthy No Bake Protein Balls! These delightful treats are incredibly versatile and satisfying, offering a perfect balance of taste and nutrition without any fuss. We’ve explored how simple ingredients come together to create a wholesome snack that’s ideal for pre- or post-workout fuel, an afternoon pick-me-up, or even a healthier dessert option. The beauty of these No Bake Protein Balls lies in their adaptability; feel free to experiment with different nut butters, add-ins like chia seeds or cocoa powder, or even a touch of honey for extra sweetness. Enjoy them chilled straight from the refrigerator for the best texture. We encourage you to get creative and make these No Bake Protein Balls your own signature snack!
Frequently Asked Questions:
Can I make these No Bake Protein Balls ahead of time?
Absolutely! No Bake Protein Balls are perfect for meal prep. Store them in an airtight container in the refrigerator for up to a week, or even freeze them for longer storage. If frozen, simply let them thaw at room temperature for a few minutes before enjoying.
What kind of protein powder works best in No Bake Protein Balls?
Most protein powders will work well. Whey, casein, soy, or plant-based protein powders (like pea or rice protein) are all excellent choices. The key is to find one you enjoy the taste of, as it will significantly impact the final flavor of your No Bake Protein Balls.
Are there any nut-free variations of No Bake Protein Balls?
Yes! For a nut-free option, you can substitute sunflower seed butter or tahini for the nut butter. Ensure your oats and any other add-ins are also processed in a nut-free facility if allergies are a concern. The texture might be slightly different, but the deliciousness will remain!
Easy No-Bake Protein Balls – Healthy Snack
Delicious and healthy no-bake protein balls perfect for a quick snack.
Ingredients
-
1 1/2 cups no stir creamy peanut butter
-
1/2 cup honey
-
1 1/3 cups old fashioned oats (rolled oats)
-
1/2 cup vanilla protein powder
-
1/8 teaspoon salt
-
1/2 cup mini chocolate chips
Instructions
-
Step 1
In a large mixing bowl, combine the creamy peanut butter and honey. Stir until thoroughly combined. -
Step 2
Add the old-fashioned oats, vanilla protein powder, and salt to the wet ingredients. Stir until a thick, dough-like mixture forms. -
Step 3
If the mixture is too dry, add a tablespoon of peanut butter or honey at a time. If it’s too wet, add oats or protein powder until it’s easily rollable. -
Step 4
Gently fold in the mini chocolate chips until evenly distributed. -
Step 5
Roll the mixture into tablespoon-sized balls and place them on a parchment-lined baking sheet. -
Step 6
Refrigerate for at least 30 minutes to allow the balls to firm up before serving.
Important Information
Nutrition Facts (Per Serving)
It is important to consider this information as approximate and not to use it as definitive health advice.
Allergy Information
Please check ingredients for potential allergens and consult a health professional if in doubt.

Leave a Comment