
Easy St. Patrick’s Day Cookies are the ultimate way to sprinkle a little luck and a lot of flavor into your March celebrations! Who doesn’t love a festive treat that’s as delightful to look at as it is to eat? These delightful cookies are a crowd-pleaser for so many reasons. They’re incredibly simple to whip up, making them perfect for even the most novice bakers, and they embody the spirit of St. Patrick’s Day with their cheerful green hues and playful decorations. What truly makes these Easy St. Patrick’s Day Cookies special is their versatility. You can customize them with your favorite sprinkles, edible glitter, or even a sweet green icing to match your personal style. Get ready to add a touch of emerald enchantment to your dessert table!
Why You’ll Adore These Cookies:
They’re incredibly quick and require minimal fuss.
The bright green color is instantly festive and fun.
Perfect for parties, school treats, or just a cozy afternoon bake.
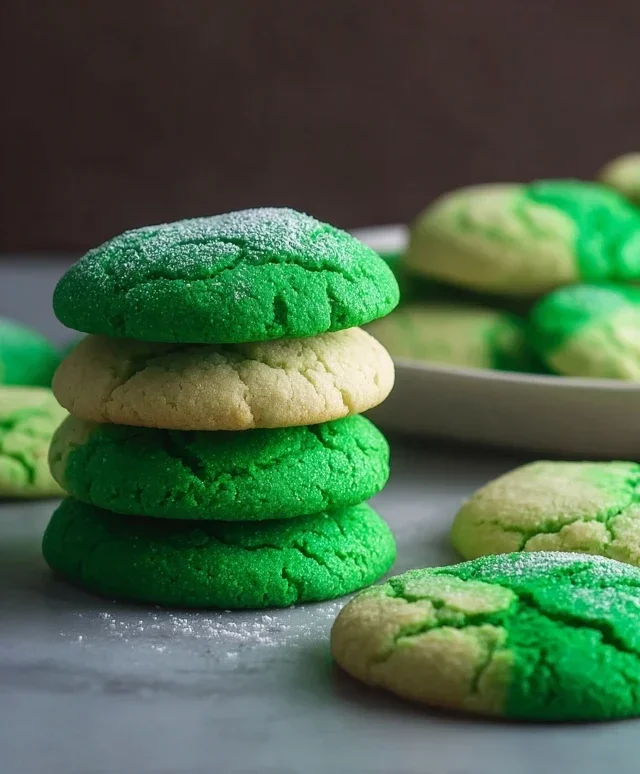
Easy St. Patrick’s Day Cookies
Looking for a fun and festive treat to celebrate St. Patrick’s Day without spending hours in the kitchen? You’ve come to the right place! These easy St. Patrick’s Day cookies are incredibly simple to make, using just a few pantry staples and a touch of green magic. They’re perfect for a classroom party, a family activity, or just to add a little extra cheer to your day. The beauty of this recipe lies in its simplicity – it starts with a cake mix, which means less fuss and more enjoyment. The resulting cookies are soft, slightly chewy, and have a wonderful vanilla flavor that’s a perfect canvas for the festive green color. And the simple powdered sugar glaze adds just the right touch of sweetness and shine. Get ready to spread some St. Paddy’s Day joy with these delightful green cookies!
Ingredients:
Making the Dough
The first step to creating our lucky green cookies is to gather all your ingredients and prepare your workspace. This recipe is so straightforward, you can even get the little ones involved in the mixing process. In a large mixing bowl, we’ll start by combining the dry cake mix. This is the foundation of our cookie, providing that tender crum extractb and classic vanilla flavor. Next, crack in your two large eggs. Eggs are crucial for binding the ingredients together and adding richness. Then, pour in the vegetable oil. Vegetable oil contributes to the moisture and chegrape juicess of the cookies, ensuring they don’t turn out dry or crum extractbly. Now comes the fun part – the color! Add the Kelly green gel food coloring to the mixture. Gel food coloring is preferred because it’s concentrated and won’t add extra liquid to your dough, which could alter the texture. Start with the 1/4 teaspoon, and if you desire a deeper green, you can always add a tiny bit more, mixing thoroughly to ensure an even distribution of color.
Now, it’s time to mix everything together. Using a sturdy spoon or an electric mixer on low speed, combine all the ingredients until they are just incorporated. Be careful not to overmix the dough. Overmixing can develop the gluten in the flour more than necessary, leading to tougher cookies. You want a soft, slightly sticky dough that holds together. The dough will be a vibrant green, ready to be transformed into delicious St. Patrick’s Day treats.
Shaping and Baking
Once your dough is ready, it’s time to shape our cookies. Preheat your oven to 350 degrees Fahrenheit (175 degrees Celsius). Line baking sheets with parchment paper. This is a small step that makes a big difference, preventing cookies from sticking and making cleanup a breeze. Now, you have a couple of options for shaping. You can roll the dough into small balls, about 1 inch in diameter, and place them on the prepared baking sheets, leaving about 2 inches between each cookie as they will spread slightly while baking. Alternatively, for a flatter, more uniformly shaped cookie, you can gently press down on each dough ball with the palm of your hand or the bottom of a glass. This recipe doesn’t require any chilling time for the dough, which is another reason it’s so wonderfully easy and quick!
Now, for the baking process. Carefully place the baking sheets into your preheated oven. Bake for approximately 8 to 10 minutes. The exact baking time will depend on your oven and the size of your cookies. You’ll know they are done when the edges are set and lightly golden, but the centers still look slightly soft. Don’t overbake them! The cookies will continue to cook slightly on the hot baking sheet after you remove them from the oven, so pulling them out when the centers are still a little soft ensures a perfectly chewy texture. Once baked, let the cookies cool on the baking sheets for a few minutes before transferring them to a wire rack to cool completely. This step is crucial for allowing the cookies to firm up properly.
Decorating the Cookies
While your cookies are cooling on the wire rack, it’s time to prepare the simple and sweet glaze that will add the finishing touch. In a small bowl, combine the granulated sugar and the powdered sugar. This sugar mixture will form the base of our simple glaze. In a separate small bowl, place the 6 tablespoons of powdered sugar. Gradually add a very small amount of liquid, starting with just a teaspoon of water or milk at a time, stirring constantly. You’re aiming for a thick but pourable consistency. You want it to be thin enough to drizzle or spread easily, but not so thin that it runs right off the cookie. If it becomes too thin, add a little more powdered sugar. If it becomes too thick, add a tiny bit more liquid. You can also add another tiny drop of green food coloring to the glaze if you’d like a more intense color contrast, or leave it white for a classic look.
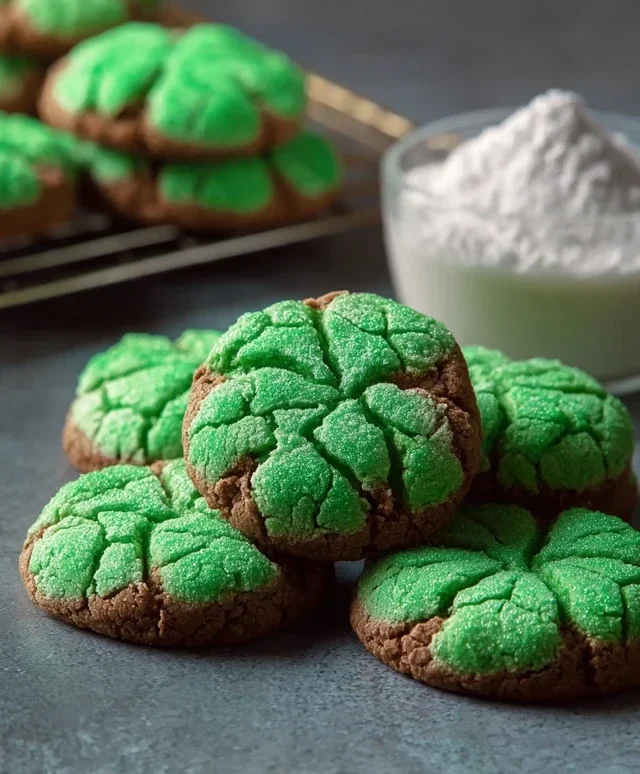
Once the cookies have cooled completely, you can begin extract decorating. Dip the tops of the cookies into the glaze, letting the excess drip back into the bowl, or use a spoon to drizzle the glaze over the cookies. For a more decorative effect, you can use a fork or a toothpick to create swirls. If you want to add some extra St. Patrick’s Day flair, you can sprinkle them with green nonpareils or edible glitter before the glaze sets. These cookies are designed to be simple, so don’t worry about perfection. The charm of these easy St. Patrick’s Day cookies is their rustic, homemade appeal. Let the glazed cookies sit on the wire rack until the glaze has set before serving or storing them. Enjoy your delicious and festive creations!
Conclusion:
There you have it! Crafting these delightful Easy St. Patrick’s Day Cookies is a wonderfully simple and rewarding way to embrace the festive spirit. The beauty of this recipe lies in its straightforward approach, making it perfect for bakers of all skill levels, from absolute begin extractners to seasoned pros looking for a quick and cheerful treat. They’re not only incredibly delicious, with their hint of vanilla and satisfying crum extractb, but also visually appealing, ready to be decorated with your favorite green icing and sprinkles. These cookies are sure to be a hit at any St. Patrick’s Day gathering, from classroom parties to family celebrations. Don’t hesitate to gather your ingredients and give them a try – I promise you won’t be disappointed!
For serving suggestions, these cookies are fantastic on their own, of course, but they also pair beautifully with a cold glass of milk or a warm cup of tea. Consider arrangin extractg them on a festive platter with other green treats for a truly impressive spread. For variations, feel free to experiment with different extracts – a touch of almond or lemon can add an interesting twist. You could also try adding a few drops of green food coloring directly into the dough for a subtly colored cookie before baking, or even incorporate mini chocolate chips for an extra burst of flavor.
Frequently Asked Questions:
Can I make these cookies ahead of time?
Absolutely! These Easy St. Patrick’s Day Cookies store wonderfully. Once completely cooled, you can store them in an airtight container at room temperature for up to 3-4 days. If you’re decorating them, ensure the icing is fully set before stacking them in the container.
What are some easy decorating ideas?
The possibilities are endless and simple! Beyond green icing and sprinkles, you can use edible gold coins, sbeef hamrock-shaped sprinkles, or even pipe simple green swirls. For a very quick touch, a dusting of powdered sugar mixed with a tiny bit of green food coloring can create a lovely effect.
Easy St. Patrick’s Day Cookies
Simple and festive green cookies perfect for St. Patrick’s Day celebrations.
Ingredients
-
1 box (15.25 oz) white cake mix (about 3 cups)
-
2 large eggs
-
1/3 cup vegetable oil
-
1/4 teaspoon Kelly green gel food coloring
-
3 tablespoons granulated sugar
-
6 tablespoons powdered sugar
Instructions
-
Step 1
Preheat oven to 350°F (175°C). Line baking sheets with parchment paper. -
Step 2
In a large bowl, combine the white cake mix, eggs, and vegetable oil. -
Step 3
Add the Kelly green gel food coloring and mix until the batter is evenly colored. -
Step 4
Drop rounded tablespoons of dough onto the prepared baking sheets. -
Step 5
In a small bowl, combine the granulated sugar and powdered sugar. Roll each cookie dough ball in the sugar mixture until coated. -
Step 6
Bake for 8-10 minutes, or until the edges are lightly golden and the centers are set. -
Step 7
Let the cookies cool on the baking sheets for a few minutes before transferring them to a wire rack to cool completely.
Important Information
Nutrition Facts (Per Serving)
It is important to consider this information as approximate and not to use it as definitive health advice.
Allergy Information
Please check ingredients for potential allergens and consult a health professional if in doubt.
Leave a Comment