
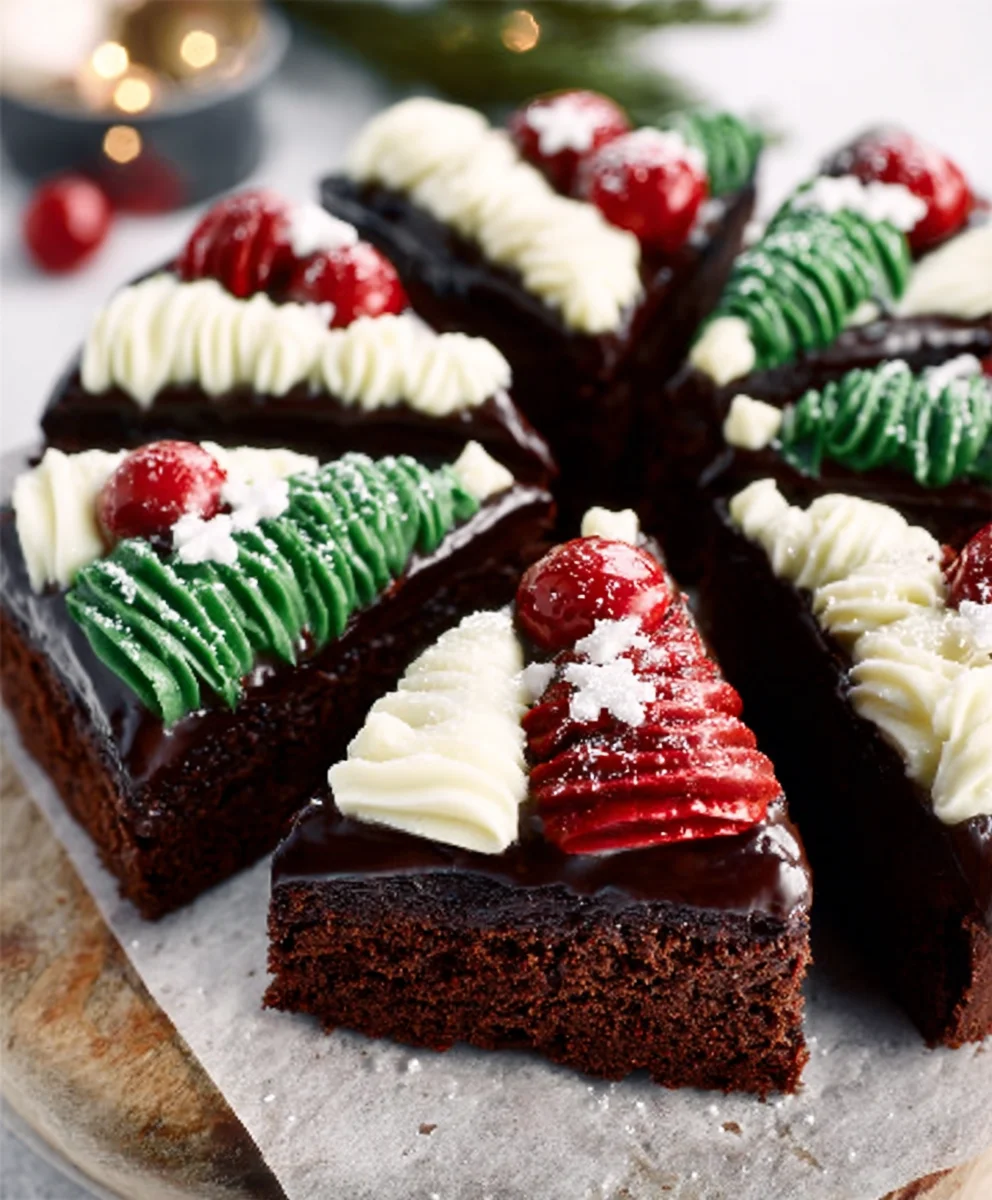
Frosted Christmas Brownies are more than just a dessert; they’re a delicious embodiment of holiday cheer. Imagin extracte biting into a rich, fudgy brownie, so intensely chocolatey it feels like a warm hug on a chilly winter’s night. Then, the magic of a sweet, creamy frosting swirls over the top, dusted with festive sprinkles that sparkle like tiny ornaments. This is why Frosted Christmas Brownies have become a beloved tradition for so many families. They offer that perfect balance of comforting chocolate decadence and playful, celebratory flair that truly defines the spirit of the season. What sets these particular Frosted Christmas Brownies apart is their incredibly moist texture and the delicate balance of sweetness that doesn’t overpower the deep cocoa flavor. Get ready to impress your loved ones with a batch that’s as delightful to make as it is to devour!
Ingredients:
- 1 cup (2 sticks or 226g) unsalted butter, melted
- 2 cups (400g) granulated sugar
- 4 large eggs, at room temperature
- 1 teaspoon vanilla extract
- 1 cup (120g) all-purpose flour
- 1 cup (95g) unsweetened cocoa powder (natural or Dutch-processed)
- 1/2 teaspoon baking powder
- 1/4 teaspoon salt
- 1 cup (170g) semi-sweet chocolate chips
For the Cream Cheese Frosting:
- 8 ounces (226g) cream cheese, softened
- 1/2 cup (1 stick or 113g) unsalted butter, softened
- 3 cups (360g) powdered sugar, sifted
- 1 teaspoon vanilla extract
- 2-3 tablespoons milk or heavy cream, as needed
- Optional: Green and red food coloring for festive decoration
For Decoration:
- Sprinkles (Christmas-themed, if available)
- Optional: Additional chocolate chips for melting
The Rich Brownie Base
Step 1: Prepare Your Pan and Melt the Butter
Begin extract by preheating your oven to 350°F (175°C). This is a crucial first step for even baking. Next, generously grease and flour a 9×13 inch baking pan. You can also line it with parchment paper, leaving an overhang on the sides, which makes lifting the brownies out a breeze later on. In a large mixing bowl, add your 1 cup of unsalted butter and melt it. You can do this in the microwave in 30-second increments, stirring in between, until it’s fully liquid. Alternatively, you can melt it gently in a saucepan over low heat. Allow the melted butter to cool slightly for a few minutes before proceeding to the next step. This prevents it from cooking the eggs prematurely.
Step 2: Combine Wet Ingredients and Sugar
Once the butter has cooled slightly, pour in the 2 cups of granulated sugar. Whisk these together until they are well combined and the mixture starts to look slightly glossy. Now, add the 4 large eggs, one at a time, whisking thoroughly after each addition. Ensure each egg is fully incorporated before adding the next. This emulsification process is key to achieving a fudgy texture. Finally, stir in the 1 teaspoon of vanilla extract. The vanilla not only adds a lovely aroma but also enhances the chocolate flavor. Don’t overmix at this stage; we just want everything to be combined.
Step 3: Incorporate the Dry Ingredients
In a separate medium bowl, whisk together the 1 cup of all-purpose flour, 1 cup of unsweetened cocoa powder, 1/2 teaspoon of baking powder, and 1/4 teaspoon of salt. Sifting these dry ingredients together helps to aerate them and prevent any clumps from forming in your brownie batter. Now, gradually add the dry ingredients to the wet ingredients, mixing on low speed or by hand with a spatula until just combined. Be careful not to overmix the batter once the flour is added; overmixing can develop the gluten in the flour, leading to tougher brownies. A few streaks of flour are okay; they will disappear as you fold in the chocolate chips.
Step 4: Fold in the Chocolate Chips and Bake
Gently fold in the 1 cup of semi-sweet chocolate chips into the brownie batter. Distribute them evenly throughout the mixture. Pour the batter into your prepared baking pan and spread it out evenly with your spatula, ensuring it reaches all the corners. Bake in the preheated oven for 30-35 minutes. The exact baking time will depend on your oven, so it’s best to check for doneness. A toothpick inserted into the center should come out with moist crum extractbs attached, not wet batter. We want them to be fudgy, not cakey, so slightly underbaking is better than overbaking.
The Decadent Cream Cheese Frosting
Step 5: Prepare the Cream Cheese Frosting
While your brownies are cooling completely on a wire rack (this is essential – frosting warm brownies will result in a melted mess!), prepare the cream cheese frosting. In a large bowl, beat the 8 ounces of softened cream cheese and 1/2 cup of softened unsalted butter together with an electric mixer until smooth and creamy. This ensures no lumps remain and the frosting has a consistent texture. Gradually add the 3 cups of sifted powdered sugar, one cup at a time, mixing on low speed until just incorporated. Then, add 1 teaspoon of vanilla extract. If the frosting is too thick, add milk or heavy cream, 1 tablespoon at a time, until you reach your desired spreading consistency. Be patient; achieving the perfect frosting texture takes a little adjustment.
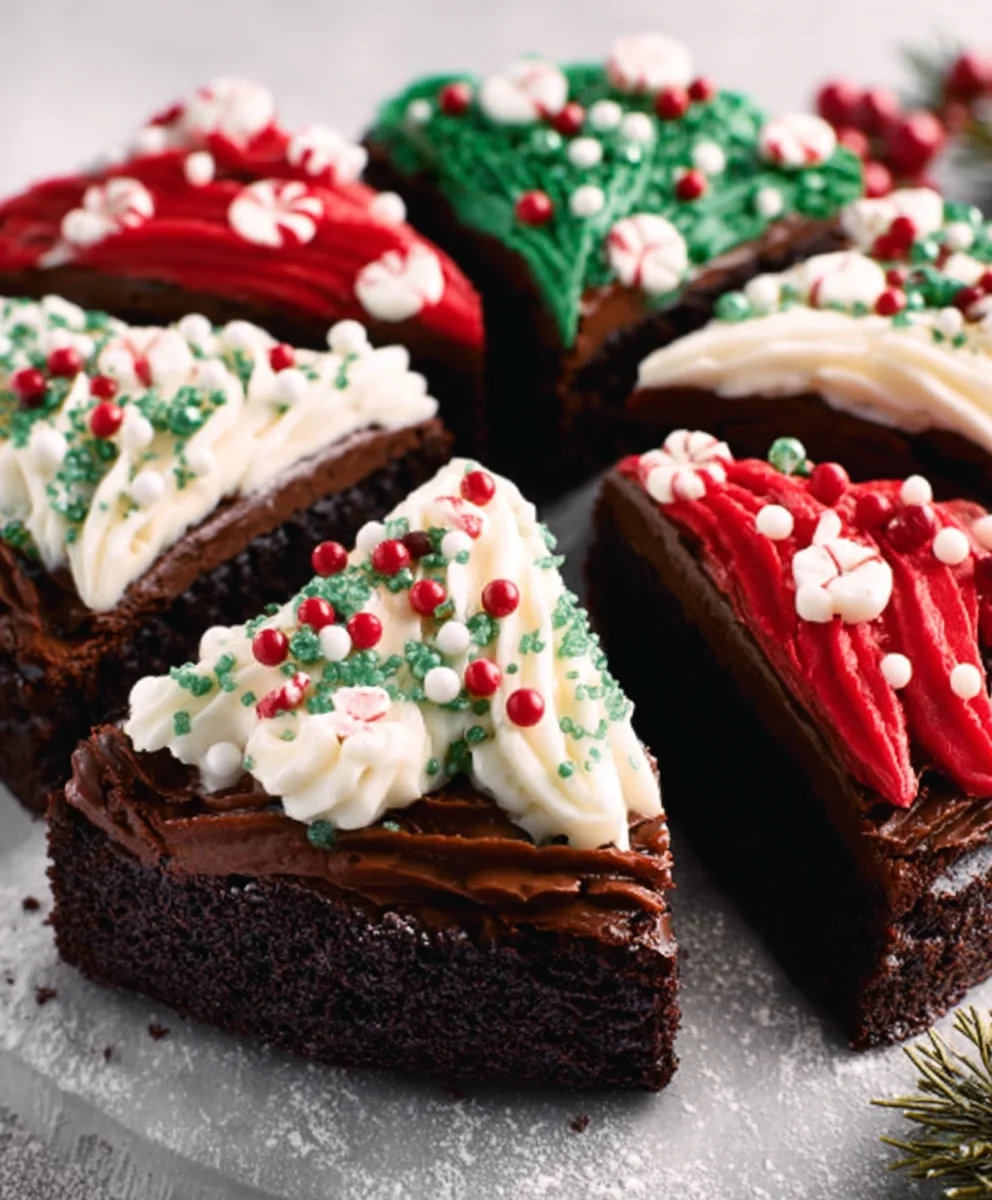
Step 6: Assemble and Decorate Your Frosted Christmas Brownies
Once the brownies have cooled completely, it’s time for the festive finnon-alcoholic ale! Spread the cream cheese frosting evenly over the top of the cooled brownies. For a classic Christmas look, you can divide the frosting into two bowls and tint one with red food coloring and the other with green food coloring. Use a piping bag with a festive tip, or even just a Ziploc bag with a corner snipped off, to create swirls, stripes, or festive designs on top of the brownies. Finally, shower your Frosted Christmas Brownies with your chosen sprinkles. For an extra touch of indulgence, you can melt some additional chocolate chips and drizzle them artfully over the top before the sprinkles set. Slice and serve these delightful treats for a perfect holiday celebration!
Conclusion:
I hope you enjoyed making and devouring these delightful Frosted Christmas Brownies! This recipe is truly a showstopper, perfect for any holiday gathering or just a cozy evening by the fire. The rich, fudgy brownie base combined with the sweet, creamy frosting creates an irresistible treat that’s sure to spread holiday cheer. Remember, the key to perfect brownies is not to overmix and to avoid overbaking. A toothpick inserted into the center should come out with moist crum extractbs, not wet batter.
For serving, I love to present these frosted masterpieces on a festive platter, perhaps dusted with a little extra edible glitter or festive sprinkles. They are wonderful on their own, but also pair beautifully with a glass of cold milk or a warm mug of hot chocolate.
Don’t be afraid to get creative with variations! You could add a swirl of peppermint extract to the frosting for a refreshing twist, or sprinkle chopped candy canes on top for an extra festive crunch. For a richer flavor, consider adding a tablespoon of instant coffee granules to the brownie batter. I encourage you to make these your own and share the joy with your loved ones!
Frequently Asked Questions:
How do I store my Frosted Christmas Brownies?
These brownies can be stored in an airtight container at room temperature for up to 3 days. If your kitchen is particularly warm, or if you prefer them firmer, you can refrigerate them. They are delicious served chilled or allowed to come to room temperature before enjoying.
Can I make the frosting ahead of time?
Yes, absolutely! The frosting can be made a day in advance and stored in an airtight container in the refrigerator. You may need to let it sit at room temperature for a few minutes and give it a good stir before frosting the brownies to achieve the right consistency.
Are there any gluten-free or vegan options for this recipe?
While this specific recipe is not gluten-free or vegan, many common substitutions can be made. For gluten-free, you can typically substitute a good quality all-purpose gluten-free flour blend for the all-purpose flour. For vegan brownies, you would need to find a vegan brownie recipe base and adapt the frosting accordingly, perhaps using vegan butter and a plant-based milk.
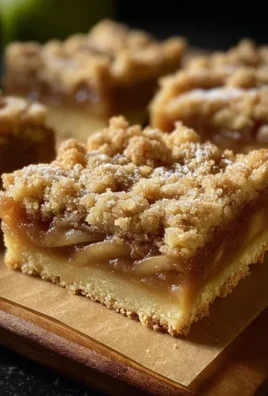
Frosted Christmas Brownies-Festive Holiday Treat
Indulge in these rich, fudgy brownies topped with a decadent cream cheese frosting and festive Christmas decorations. A perfect holiday treat for any celebration.
Ingredients
-
1 cup unsalted butter, melted
-
2 cups granulated sugar
-
4 large eggs
-
1 teaspoon vanilla extract
-
1 cup all-purpose flour
-
1 cup unsweetened cocoa powder
-
1/2 teaspoon baking powder
-
1/4 teaspoon salt
-
1 cup semi-sweet chocolate chips
-
8 ounces cream cheese, softened
-
1/2 cup unsalted butter, softened
-
3 cups powdered sugar, sifted
-
2-3 tablespoons milk or heavy cream
-
Sprinkles
Instructions
-
Step 1
Preheat oven to 350°F (175°C). Grease and flour a 9×13 inch baking pan. Melt 1 cup of unsalted butter and let it cool slightly. -
Step 2
In a large bowl, whisk together the cooled melted butter and 2 cups of granulated sugar until glossy. Add 4 large eggs one at a time, whisking well after each. Stir in 1 teaspoon of vanilla extract. -
Step 3
In a separate bowl, whisk together 1 cup of all-purpose flour, 1 cup of unsweetened cocoa powder, 1/2 teaspoon baking powder, and 1/4 teaspoon salt. Gradually add the dry ingredients to the wet ingredients, mixing until just combined. -
Step 4
Gently fold in 1 cup of semi-sweet chocolate chips. Pour the batter into the prepared pan and spread evenly. Bake for 30-35 minutes, or until a toothpick inserted in the center comes out with moist crumbs. -
Step 5
While brownies cool completely, prepare frosting. Beat 8 ounces softened cream cheese and 1/2 cup softened unsalted butter until smooth. Gradually add 3 cups sifted powdered sugar, then 1 teaspoon vanilla extract. Add milk or cream as needed for spreading consistency. -
Step 6
Spread the cream cheese frosting evenly over the cooled brownies. Decorate with festive sprinkles and optional melted chocolate drizzles.
Important Information
Nutrition Facts (Per Serving)
It is important to consider this information as approximate and not to use it as definitive health advice.
Allergy Information
Please check ingredients for potential allergens and consult a health professional if in doubt.
Leave a Comment