
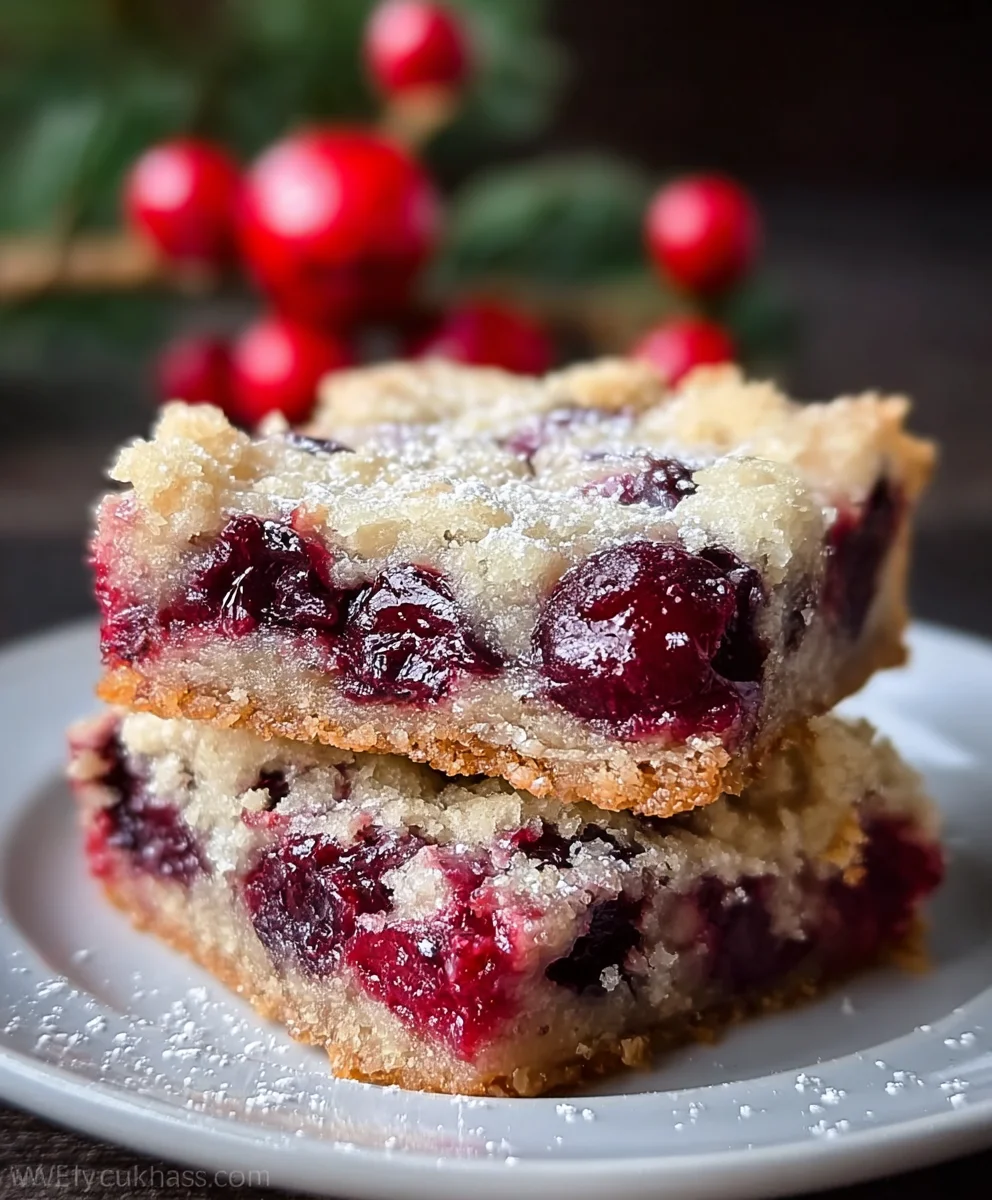
Cherry Bars are more than just a sweet treat; they’re a portal to cherished memories and pure, unadulterated joy. Who doesn’t adore that perfect bite – the tender, buttery crumb base, bursting with vibrant, slightly tart cherry filling, all crowned with a delicate streusel topping? It’s the kind of dessert that brings smiles to faces, from the youngest diner to the most discerning grown-up. These Cherry Bars capture the essence of simple pleasures, evoking sun-drenched afternoons and cozy gatherings. What truly sets these Cherry Bars apart is their irresistible balance of textures and flavors – a delightful dance between soft and crumbly, sweet and tangy, that leaves you craving just one more piece. Get ready to bake your way to happiness with this delightful recipe!
Ingredients:
- 1 cup unsalted butter, softened
- 1 ½ cups granulated sugar
- 4 large eggs
- 1 tsp vanilla extract
- 3 cups all-purpose flour
- 1 tsp baking powder
- ½ tsp salt
- 1 can (21 oz) cherry pie filling
- 1 cup powdered sugar
- 2 tbsp milk
- ½ tsp almond extract
Making the Cherry Bars
Preparing the Crust and Filling
First things first, let’s get our oven preheated and our baking pan ready. You’ll want to preheat your oven to 350 degrees Fahrenheit (175 degrees Celsius). This consistent temperature is key to ensuring your cherry bars bake evenly. Next, grab a 9×13 inch baking pan. I like to grease it generously with butter or cooking spray, and then lightly flour it. This prevents the bars from sticking, which is a common frustration. Alternatively, you can line your pan with parchment paper, leaving an overhang on the sides. This makes lifting the entire baked crust out of the pan much easier for cutting.
Now, let’s tackle the crust. In a large mixing bowl, cream together the softened unsalted butter and the granulated sugar until the mixture is light and fluffy. This creaming process incorporates air, which contributes to a tender crust. You can use an electric mixer for this, or a sturdy whisk and some elbow grease. Once it’s wonderfully fluffy, it’s time to add the eggs, one at a time, beating well after each addition. Following the eggs, stir in the vanilla extract. This will form the wet base of our crust.
In a separate medium bowl, whisk together the all-purpose flour, baking powder, and salt. Whisking ensures these dry ingredients are evenly distributed, which means the baking powder will work its magic throughout the crust, giving it a slight lift. Gradually add this dry mixture to the wet ingredients in the large bowl, mixing on low speed or by hand until just combined. Be careful not to overmix here; overmixing can develop the gluten in the flour too much, leading to a tough crust.
Now, we’ll press about two-thirds of this dough evenly into the bottom of your prepared baking pan. You can use your hands or the back of a spoon to spread it out. It doesn’t need to be perfect, just a nice, even layer. This will form the base of our delicious cherry bars. For the remaining dough, set it aside. We’ll use this for the topping.
Assembling and Baking the Bars
Open your can of cherry pie filling. Give it a good stir to ensure the cherries and the syrupy filling are well combined. Spoon the cherry pie filling evenly over the pressed crust in the baking pan. Try to get it as close to the edges as possible, but don’t worry about absolute perfection. The filling will spread slightly as it bakes. If you have any particularly large cherry pieces, you can give them a gentle mash with your spoon.
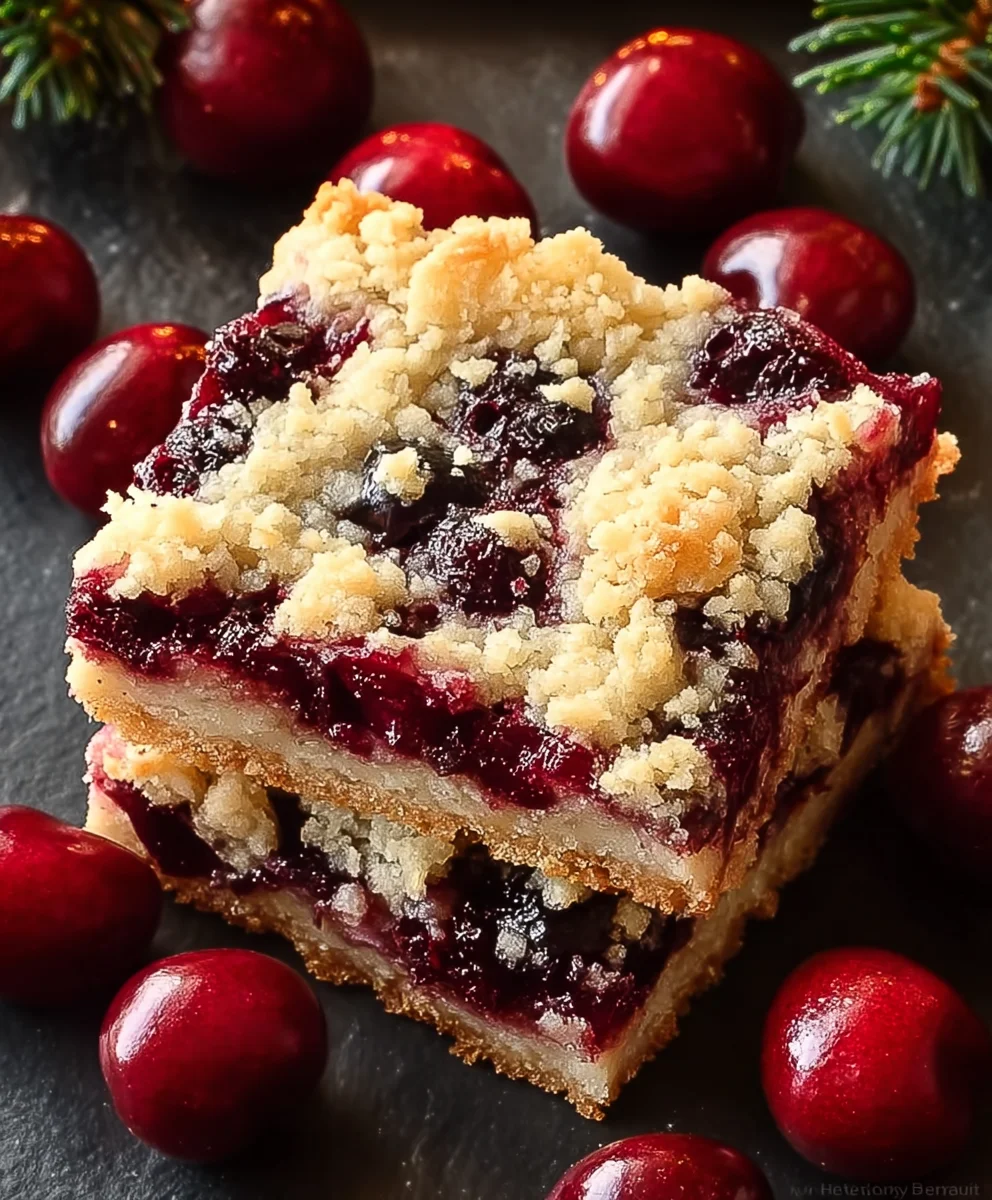
Now, it’s time for the crumble topping. Take the reserved dough and crumble it over the cherry filling. You can do this by pinching small pieces of dough and scattering them, or by using a fork to break it up into smaller chunks. The goal is to create a more rustic, crumbly topping rather than a solid layer. Some small gaps are perfectly fine; they’ll allow the cherry filling to peek through beautifully. This contrast of textures is what makes cherry bars so delightful.
Place the pan in your preheated oven and bake for 35 to 45 minutes, or until the crust is golden brown and the cherry filling is bubbly around the edges. The baking time can vary depending on your oven, so keep an eye on them. You’ll know they’re ready when you see that gorgeous golden hue on the crust and the filling is actively simmering. It’s that bubbling that tells us everything has cooked through nicely and the flavors have melded together.
Cooling and Glazing
Once baked to perfection, carefully remove the pan from the oven and place it on a wire rack to cool completely. This is a crucial step for cherry bars! If you try to cut them while they are still warm, the filling will be runny, and the bars will fall apart. Patience is key here. Let them cool for at least 2-3 hours, or until they are fully set and at room temperature. For even cleaner cuts, you can even chill them in the refrigerator for about an hour after they’ve cooled to room temperature.
While the bars are cooling, let’s prepare the simple glaze that will elevate these cherry bars from delicious to divine. In a small bowl, whisk together the powdered sugar, milk, and almond extract. Start with the powdered sugar and milk, and gradually add the milk until you reach a smooth, pourable consistency. You might need a little more or less milk depending on the humidity and how fine your powdered sugar is. The almond extract adds a subtle nutty depth that pairs wonderfully with the cherries. Whisk until there are no lumps of powdered sugar remaining.
Once the cherry bars have cooled completely, drizzle the glaze evenly over the top. You can use a spoon to create swirls or just a simple back-and-forth motion to cover the surface. The glaze will harden slightly as it sets, adding a lovely sweet finish and a touch of elegance. For the best slicing experience, use a sharp knife and wipe it clean between cuts. Enjoy your homemade cherry bars!
Conclusion:
And there you have it – your guide to creating the most delicious Cherry Bars! This recipe delivers a delightful balance of sweet and tart, with a wonderfully crumbly base and topping that perfectly complements the vibrant cherry filling. Whether you’re looking for a crowd-pleasing dessert for a special occasion or simply a sweet treat to brighten your day, these Cherry Bars are sure to be a hit. I encourage you to give them a try; I’m confident you’ll be delighted with the results and find yourself making them again and again.
For serving suggestions, these bars are fantastic on their own, but they also pair beautifully with a scoop of vanilla bean ice cream or a dollop of freshly whipped cream. If you’re feeling adventurous, consider a sprinkle of toasted slivered almonds on top for an extra layer of texture and flavor.
As for variations, feel free to experiment! You can substitute other stone fruits like raspberries or blueberries for the cherries, or even combine them for a mixed berry delight. A touch of almond extract in the crust can also add a lovely depth of flavor.
Frequently Asked Questions:
Can I use canned cherries instead of fresh for my Cherry Bars?
Yes, absolutely! If using canned cherries, be sure to drain them very well to prevent excess liquid from making the bars soggy. You might also want to adjust the sugar in the filling slightly, depending on how sweet the canned cherries are.
How should I store leftover Cherry Bars?
Store your delicious Cherry Bars in an airtight container at room temperature for up to 3 days, or in the refrigerator for up to a week. They are also freezer-friendly; simply wrap individual bars tightly before freezing.
What is the best way to ensure the crust is crumbly and not tough?
The key to a tender, crumbly crust is to avoid overmixing the dough once the wet ingredients are added to the dry. Mix just until combined. Also, ensuring your butter is cold and cut into small pieces helps create those desirable flaky crumbs.
Sweet Cherry Bars- Easy Festive Dessert
A simple and festive dessert featuring a tender crust, sweet cherry filling, and a delightful crumb topping, finished with a simple glaze.
Ingredients
-
1 cup unsalted butter, softened
-
1 ½ cups granulated sugar
-
4 large eggs
-
1 tsp vanilla extract
-
3 cups all-purpose flour
-
1 tsp baking powder
-
½ tsp salt
-
1 can (21 oz) cherry pie filling
-
1 cup powdered sugar
-
2 tbsp milk
-
½ tsp almond extract
Instructions
-
Step 1
Preheat oven to 350°F (175°C). Grease and flour a 9×13 inch baking pan or line with parchment paper. In a large bowl, cream together softened butter and granulated sugar until light and fluffy. Beat in eggs one at a time, then stir in vanilla extract. -
Step 2
In a separate bowl, whisk together flour, baking powder, and salt. Gradually add dry ingredients to wet ingredients, mixing until just combined. Do not overmix. -
Step 3
Press about two-thirds of the dough evenly into the bottom of the prepared pan for the crust. Set the remaining dough aside for the topping. -
Step 4
Spread the cherry pie filling evenly over the crust. Crumble the reserved dough over the cherry filling to create a rustic topping. -
Step 5
Bake for 35 to 45 minutes, or until the crust is golden brown and the filling is bubbly. Let cool completely on a wire rack. -
Step 6
While the bars cool, prepare the glaze by whisking together powdered sugar, milk, and almond extract until smooth and pourable. Drizzle the glaze over the cooled bars.
Important Information
Nutrition Facts (Per Serving)
It is important to consider this information as approximate and not to use it as definitive health advice.
Allergy Information
Please check ingredients for potential allergens and consult a health professional if in doubt.

Leave a Comment