
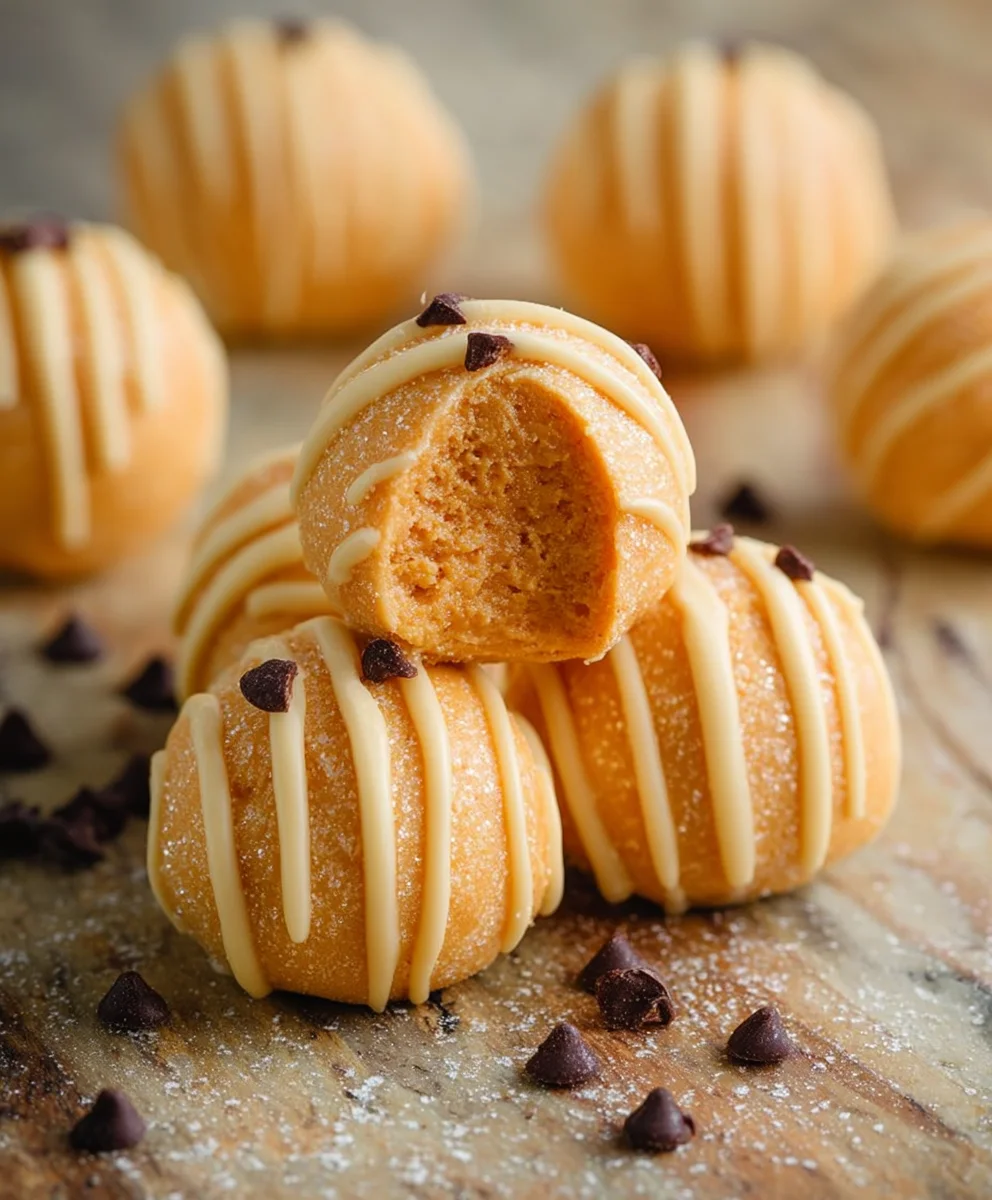
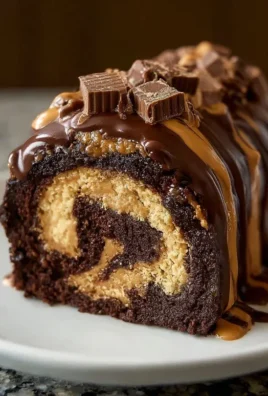
Pumpkin Cheesecake Truffles are, for me, the quintessential autumn indulgence – a little bite of seasonal magic that encapsulates everything wonderful about crisp air and cozy gatherings. Imagine the rich, creamy tang of classic cheesecake, perfectly blended with the warm, comforting spices of pumpkin pie, all enrobed in a smooth, decadent chocolate shell. It’s a sophisticated twist on beloved flavors, offering a convenient, no-bake solution to your dessert cravings.
While the classic chocolate truffle hails from European patisseries, this delightful fusion is a testament to the modern American love affair with pumpkin spice during the fall season. It merges the elegance of a traditional truffle with the comforting familiarity of a homemade pumpkin dessert, making it a beloved staple for holiday tables and festive occasions.
What truly makes these treats irresistible is their incredible balance of flavors and textures. Each delicate truffle offers a melt-in-your-mouth creaminess, a burst of spicy-sweet pumpkin, and the satisfying snap of chocolate. They are incredibly easy to prepare ahead of time, making them the ultimate fuss-free dessert for entertaining or simply treating yourself. I find these Pumpkin Cheesecake Truffles to be the perfect grab-and-go indulgence, delivering maximum flavor with minimal effort. Get ready to impress your guests and delight your taste buds with this simple yet stunning recipe.
Ingredients:
- For the Pumpkin Cheesecake Truffle Base:
-
16 ounces (two 8-ounce blocks) full-fat cream cheese, softened: I always make sure to use full-fat cream cheese for the best texture and richness in these Pumpkin Cheesecake Truffles. It needs to be very soft to ensure a smooth, lump-free base, so plan ahead and let it sit at room temperature for at least an hour, or gently soften it in the microwave in 15-second intervals until pliable.
-
1 cup (about 8.5 ounces) pumpkin puree: Be sure to grab pure pumpkin puree, not pumpkin pie filling! The pie filling has added sugars and spices that we don’t want to double up on or have control over in this recipe. I find the plain puree gives the most authentic pumpkin flavor without being overly sweet.
-
1 cup powdered sugar (confectioners’ sugar), sifted: Powdered sugar dissolves beautifully into the cream cheese mixture, giving us that wonderfully smooth, melt-in-your-mouth texture that is essential for perfect Pumpkin Cheesecake Truffles. Sifting it helps prevent any lumps.
-
2 teaspoons pumpkin pie spice: This blend typically includes cinnamon, nutmeg, ginger, and cloves, providing that quintessential fall flavor. If you don’t have pumpkin pie spice on hand, you can create your own mix with 1.5 teaspoons ground cinnamon, 0.5 teaspoon ground ginger, 0.25 teaspoon ground nutmeg, and a tiny pinch of ground cloves.
-
1 teaspoon pure vanilla extract: A good quality vanilla extract enhances all the other flavors and adds a lovely aromatic note to our Pumpkin Cheesecake Truffles.
-
½ cup graham cracker crumbs (optional, but highly recommended): I love adding graham cracker crumbs to my Pumpkin Cheesecake Truffles because they provide a subtle textural contrast and a hint of that classic cheesecake crust flavor. It’s not strictly necessary, but it truly elevates the experience.
-
- For the Chocolate Coating:
-
16-20 ounces melting chocolate (chocolate melting wafers, good quality chocolate chips, or chopped baking chocolate): This is the shell for our delightful Pumpkin Cheesecake Truffles. You can choose milk chocolate, dark chocolate, or white chocolate based on your preference. I often opt for a good quality melting wafer as it melts smoothly and sets beautifully without needing tempering.
-
1-2 tablespoons coconut oil or shortening (optional, but recommended): Adding a small amount of coconut oil or shortening to your melting chocolate helps to thin it slightly, making it smoother and easier to dip your Pumpkin Cheesecake Truffles. It also helps the coating set with a lovely, glossy finish and prevents cracking.
-
- For Decoration (Optional):
-
Autumn-themed sprinkles: These add a festive touch and a bit of fun color to your finished Pumpkin Cheesecake Truffles.
-
Finely chopped pecans or walnuts: A sprinkle of nuts provides extra texture and a complementary flavor to the pumpkin and chocolate.
-
Additional white chocolate or contrasting chocolate for drizzling: A simple drizzle can make your truffles look professionally finished.
-
Preparing Your Divine Pumpkin Cheesecake Base
-
Soften the Cream Cheese: First things first, we need to get that cream cheese perfectly soft. If you haven’t already, take your two blocks of full-fat cream cheese out of the fridge and let them sit at room temperature for at least an hour, or even up to two hours. This is absolutely critical for achieving a smooth, lump-free Pumpkin Cheesecake Truffle base. If you’re in a hurry (and who isn’t sometimes?), you can carefully soften it in the microwave. Remove the foil wrapper, place the cream cheese in a microwave-safe bowl, and microwave on high for 15-20 second intervals, stirring well after each, until it’s very soft and pliable but not melted. You want it to be creamy, like soft butter.
-
Combine Cream Cheese and Sugar: In the bowl of a stand mixer fitted with the paddle attachment, or in a large bowl using a hand mixer, add your softened cream cheese and the sifted powdered sugar. Start mixing on low speed to incorporate the sugar without creating a dust cloud (a common kitchen mishap, trust me!). Once the sugar is mostly incorporated, increase the speed to medium and beat for 2-3 minutes until the mixture is incredibly smooth, creamy, and free of any lumps. Scrape down the sides of the bowl frequently with a rubber spatula to ensure everything is evenly mixed. This step is key to a luscious base for our Pumpkin Cheesecake Truffles.
-
Add Pumpkin and Spices: Now, it’s time to infuse that wonderful pumpkin flavor! To the cream cheese mixture, add the pumpkin puree, pumpkin pie spice, and pure vanilla extract. Continue mixing on low speed until just combined. Be careful not to overmix at this stage; we just want everything incorporated smoothly. Overmixing can sometimes incorporate too much air, which isn’t ideal for a dense truffle consistency. You’ll see the mixture transform into a beautiful, pale orange hue, smelling wonderfully of autumn. This is the heart of our “Pumpkin Cheesecake Truffles” flavor profile.
-
Fold in Graham Cracker Crumbs (Optional): If you’ve decided to include the graham cracker crumbs (and I highly recommend it for that classic cheesecake crust essence!), gently fold them into the pumpkin cheesecake mixture using your rubber spatula. You don’t want to beat them in with the mixer, as this can break down the crumbs too much. Just a few gentle folds until they are evenly distributed. This addition will give your Pumpkin Cheesecake Truffles a little extra texture and dimension.
-
First Chill – The Essential Setting Stage: This is arguably the most crucial step for firm, scoopable truffles. Cover the bowl tightly with plastic wrap and refrigerate the pumpkin cheesecake mixture for at least 4 hours, or ideally overnight. Do not skip this step! The mixture needs to firm up considerably so that you can easily roll it into balls. If it’s too soft, you’ll have a sticky mess, and your Pumpkin Cheesecake Truffles won’t hold their shape during the dipping process. I usually prepare the base the day before I plan to dip, allowing it to chill thoroughly overnight.
Chilling and Shaping the Truffles
-
Prepare Your Workspace: Line a large baking sheet with parchment paper or a silicone baking mat. This will prevent your shaped truffles from sticking and make transfer easy. Have a small cookie scoop (about 1 tablespoon in size) ready, as well as an empty bowl for any extra mixture.
-
Scoop and Roll the Truffles: Once your pumpkin cheesecake mixture is thoroughly chilled and firm, use your cookie scoop to portion out small, even amounts. I find a 1-tablespoon scoop is perfect for bite-sized Pumpkin Cheesecake Truffles. Gently roll each portion between your palms to form smooth, round balls. Work relatively quickly, as the heat from your hands can start to soften the mixture. If the mixture becomes too soft to handle, pop it back into the fridge for 15-20 minutes to firm up again. Precision in size here ensures even coating later on.
-
Second Chill – The Firming Before Dipping: Arrange the rolled Pumpkin Cheesecake Truffles on your prepared baking sheet, leaving a small space between each. Once all the truffles are formed, place the baking sheet back into the refrigerator or freezer. Chill them for another 30-60 minutes in the fridge, or 15-20 minutes in the freezer. This step is vital to ensure the truffles are very firm and cold before dipping. A cold truffle will help the chocolate coating set quickly and prevent the truffle from breaking apart or melting into the warm chocolate. This is a critical factor for success when making “Pumpkin Cheesecake Truffles.”
Crafting the Silky Chocolate Coating
-
Choose Your Melting Method: While your Pumpkin Cheesecake Truffles are chilling, it’s time to prepare the chocolate coating. There are a couple of ways to melt your chocolate:
- Double Boiler Method (My Preferred for Control): Fill a saucepan with about an inch or two of water and bring it to a gentle simmer. Place a heatproof bowl (glass or metal) over the saucepan, ensuring the bottom of the bowl doesn’t touch the water. Add your chosen melting chocolate and the coconut oil (if using) to the bowl. Stir occasionally with a clean, dry spatula until the chocolate is completely melted and smooth. The gentle, indirect heat prevents the chocolate from scorching.
- Microwave Method (Quicker, but Requires Care): Place your chocolate and coconut oil (if using) in a microwave-safe bowl. Microwave on high power for 30 seconds, then remove and stir thoroughly. Continue microwaving in 15-20 second intervals, stirring well after each, until the chocolate is smooth and fully melted. Be extremely careful not to overheat the chocolate, as it can seize and become thick and unusable.
No matter which method you use, ensure your bowl and utensils are completely dry. Even a tiny drop of water can cause chocolate to seize, turning it into a grainy, unworkable mess.
-
Maintain Chocolate Consistency: You want your melted chocolate to be smooth and fluid enough for dipping. The coconut oil or shortening really helps achieve this. If your chocolate seems too thick, you can add another half-teaspoon of coconut oil, stir, and reassess. If you’re working with a large batch, you might want to keep the bowl of melted chocolate over a very low double boiler or in a chocolate warmer to maintain its liquid state throughout the dipping process. This will ensure an even, beautiful coating on all your Pumpkin Cheesecake Truffles.
Dipping and Decorating Your Beautiful Truffles
-
Set Up Your Dipping Station: Take your chilled Pumpkin Cheesecake Truffles out of the fridge/freezer. Have your melted chocolate ready, along with your chosen decorations (sprinkles, nuts, etc.). Keep your parchment-lined baking sheet nearby to place the dipped truffles. I also like to have a small bowl with a couple of toothpicks or a dipping fork handy.
-
Dip the Truffles: Using a toothpick or a dipping fork, carefully pick up one cold truffle. Submerge it completely in the melted chocolate. Tap the fork or toothpick gently against the rim of the bowl to allow any excess chocolate to drip off. You want a nice, even coating, not a thick blob. Work relatively quickly here, as the cold truffle will help the chocolate set faster.
-
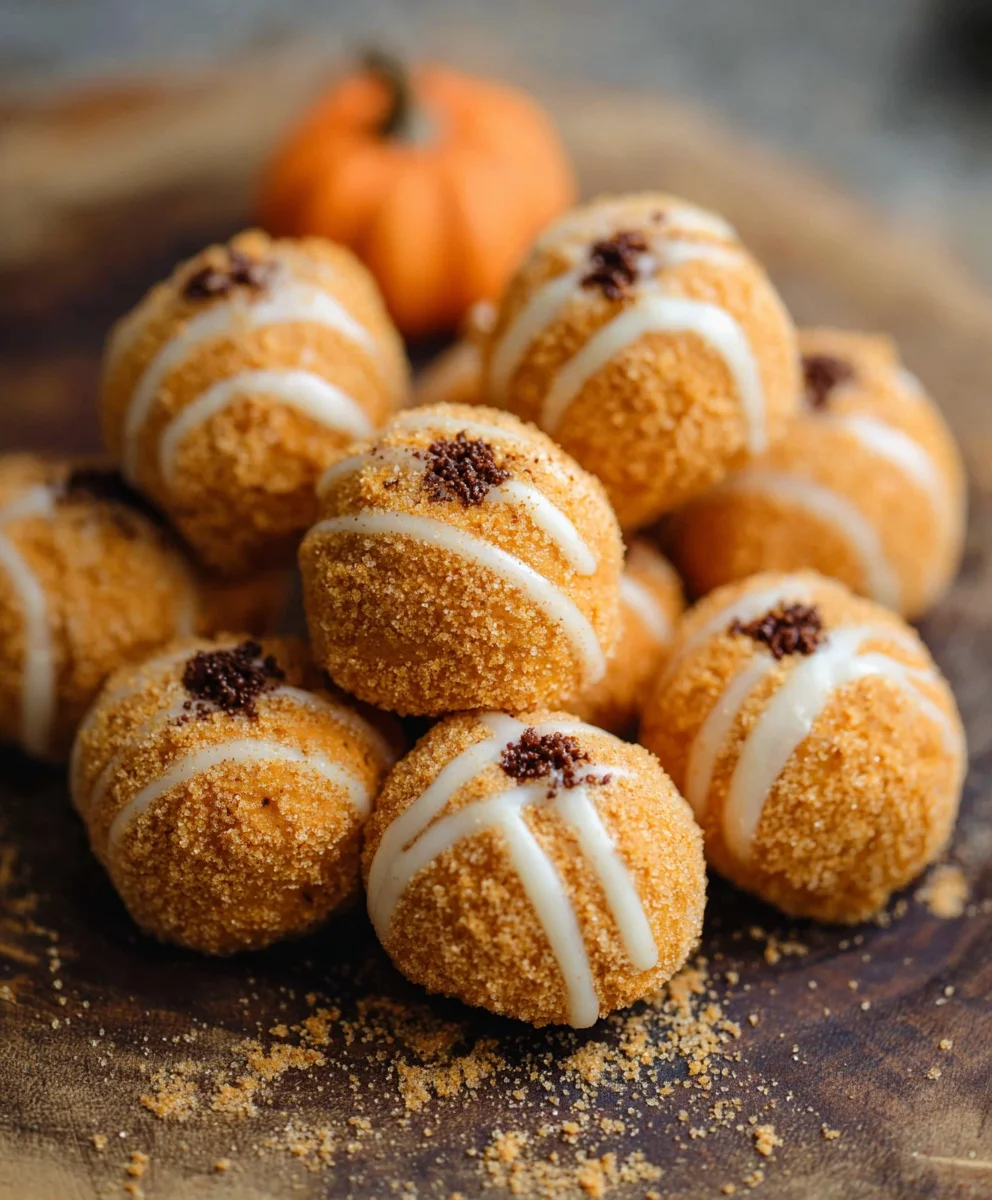
Decorate Immediately: As soon as you place the dipped Pumpkin Cheesecake Truffle back onto the parchment-lined baking sheet, sprinkle it with your chosen decorations (sprinkles, chopped nuts, etc.) if desired. The chocolate will start to set almost immediately due to the cold truffle, so you need to act fast for the decorations to adhere properly. If you plan to drizzle with a contrasting chocolate, you can do this after all the truffles have been dipped and the primary coating has set.
-
Repeat and Work in Batches: Continue dipping and decorating your Pumpkin Cheesecake Truffles, working in small batches if necessary to keep your truffles cold and your chocolate at the right consistency. If your truffles start to soften too much while you’re working, pop the baking sheet back into the fridge for 10-15 minutes to firm up again. If your chocolate starts to thicken, gently reheat it using your preferred method until it’s smooth and fluid once more.
-
Optional Drizzle: If you’re adding a drizzle, melt a small amount of white chocolate or another contrasting chocolate. You can do this in the microwave or a small bowl over simmering water. Transfer the melted chocolate to a small piping bag or a Ziploc bag with a tiny corner snipped off. Drizzle decorative lines over the set chocolate truffles. This adds an extra layer of visual appeal and flavor to your “Pumpkin Cheesecake Truffles.”
Final Chill and Storage Tips
-
Final Chill to Set: Once all your Pumpkin Cheesecake Truffles are dipped and decorated, place the entire baking sheet back into the refrigerator for at least 30-60 minutes, or until the chocolate coating is completely set and firm to the touch. This ensures the shell is crisp and prevents any smudging.
-
Storage: Store your finished Pumpkin Cheesecake Truffles in an airtight container in the refrigerator. They will keep beautifully for up to 1 week. If you want to store them for longer, they can be frozen in an airtight container for up to 1 month. Just be sure to thaw them in the refrigerator before serving for the best texture. These delightful “Pumpkin Cheesecake Truffles” are a fantastic make-ahead treat for any occasion!
Conclusion:
And there you have it, my friends! We’ve reached the sweet finale of our culinary adventure, and I truly hope you’re as excited as I am about the prospect of creating these delightful morsels. This isn’t just another dessert recipe; it’s a celebration of autumn’s finest flavors, meticulously crafted into a bite-sized indulgence that promises to enchant your taste buds. What makes these particular treats an absolute must-try, you ask? It’s the impeccable balance of creamy, rich texture combined with the comforting, aromatic spices that instantly transport you to a cozy fall evening. Imagine the luscious tang of cream cheese perfectly complementing the earthy sweetness of pumpkin, all brought together with a symphony of cinnamon, nutmeg, and ginger. Each truffle is a little parcel of pure bliss, offering an intense burst of flavor that belies its diminutive size. They are surprisingly simple to prepare, yet they possess an elegance and gourmet appeal that will impress even the most discerning palates. Forget complicated baking projects; these are the kind of treats that allow you to achieve show-stopping results with minimal fuss, making them perfect for both seasoned bakers and complete novices alike. The effort-to-reward ratio here is off the charts!
Now, let’s talk about making these beauties your own. While the basic recipe for these wonderful truffles is perfect as is, part of the joy of cooking lies in personalization. When it comes to serving, these exquisite confections are incredibly versatile. They make an ideal after-dinner treat, perhaps served alongside a freshly brewed cup of coffee or a spiced chai latte for a truly harmonious experience. Imagine them artfully arranged on a holiday dessert platter, adding a touch of sophisticated autumnal charm to your Thanksgiving feast or Christmas gathering. They also make fantastic edible gifts, packaged in charming little boxes for friends, family, or even as a thoughtful host gift. For an extra touch of pizzazz, consider rolling them in a variety of coatings beyond the suggested white chocolate. Dark chocolate provides a lovely bitter counterpoint, while milk chocolate offers a classic, sweeter appeal. For a textural crunch, try finely crushed graham crackers or gingersnap cookies, which would add an additional layer of spicy warmth and a delightful texture. A simple dusting of cocoa powder or powdered sugar can also be elegant. And why stop there? Consider a sprinkle of toasted, finely chopped pecans or walnuts for a nutty depth, or a delicate drizzle of caramel sauce over the finished truffles for an added layer of decadence. If you’re feeling adventurous, you could even infuse a hint of liqueur into the cream cheese mixture – a touch of Kahlua for coffee notes, or a splash of Cointreau for an orange zest accent could elevate them to an adult-only indulgence. The possibilities for customization are truly endless, allowing you to tailor them to any occasion or preference.
So, my fellow dessert enthusiasts, what are you waiting for? This is your invitation, a gentle nudge, to step into your kitchen and experience the magic of these exquisite treats for yourself. Don’t just read about the delightful texture and the warming spices; go ahead and make them! I promise you, the process is as enjoyable as the outcome. There’s something incredibly satisfying about transforming simple ingredients into something so utterly delicious and beautiful. Whether you’re whipping up a batch for a special occasion, treating yourself to a well-deserved indulgence, or sharing the joy with loved ones, these Pumpkin Cheesecake Truffles are guaranteed to bring smiles and satisfy even the most ardent sweet tooth. I am genuinely excited for you to discover the joy of creating these bite-sized wonders. Once you’ve had the chance to whip up your own batch, I would absolutely love to hear about your experience! Did you stick to the original recipe, or did you venture into exciting new variations? What coatings did you choose, and who did you share them with? Your stories and feedback are what truly bring these recipes to life for me and for other aspiring bakers in our community. Please, share your triumphs, your creative twists, and even any questions you might have in the comments section below. Let’s build a vibrant community of pumpkin and cheesecake lovers, celebrating the simple, profound pleasure of homemade treats together. Happy baking, everyone, and get ready to fall in love with your new favorite autumn dessert!
Pumpkin Cheesecake Truffles
Easy, no-bake Pumpkin Cheesecake Truffles blend the rich, creamy tang of cheesecake with warm pumpkin pie spices, all enrobed in a smooth chocolate shell. A perfect seasonal treat for autumn gatherings!
Ingredients
-
1 tbsp butter, softened
-
4 oz cream cheese, softened at room temperature
-
½ cup canned pumpkin puree
-
1 (14-oz) can sweetened condensed milk
-
1 ½ tsp pumpkin pie spice
-
½ cup graham cracker crumbs
-
⅓ cup white chocolate chips
-
Orange food coloring, as needed (optional)
-
Granulated sugar, as needed, for rolling
-
Chocolate chips, for topping
Instructions
-
Step 1
In a large bowl, beat the softened cream cheese with softened butter until smooth and creamy. Stir in the pumpkin puree, sweetened condensed milk, and pumpkin pie spice until well combined. Gently fold in the graham cracker crumbs and optional orange food coloring until evenly distributed. -
Step 2
Cover the bowl tightly with plastic wrap and refrigerate the pumpkin cheesecake mixture for at least 4 hours, or ideally overnight, until it is very firm. -
Step 3
Line a baking sheet with parchment paper. Scoop about 1 tablespoon of the chilled mixture and roll between your palms to form smooth, round balls. If desired, roll each ball in granulated sugar. Place shaped truffles on the prepared baking sheet. -
Step 4
Refrigerate the shaped truffles for another 30-60 minutes, or freeze for 15-20 minutes, until they are very firm and cold. This is crucial for dipping. -
Step 5
While truffles chill, melt your desired chocolate chips (and white chocolate chips if using for coating/drizzle). Use a double boiler or microwave, stirring frequently, until smooth and fluid. Ensure no water gets into the chocolate. -
Step 6
Using a fork or toothpick, dip each cold truffle into the melted chocolate, allowing excess to drip off. Immediately place the dipped truffle back on the parchment-lined baking sheet. Decorate immediately with chocolate chips for topping, or drizzle with additional melted white chocolate if desired. Work quickly as the chocolate sets fast. -
Step 7
Refrigerate the dipped and decorated truffles for at least 30-60 minutes until the chocolate coating is completely set. Store finished Pumpkin Cheesecake Truffles in an airtight container in the refrigerator for up to 1 week, or freeze for up to 1 month.
Important Information
Nutrition Facts (Per Serving)
It is important to consider this information as approximate and not to use it as definitive health advice.
Allergy Information
Please check ingredients for potential allergens and consult a health professional if in doubt.
Leave a Comment