
S’mores Seven Layer Bars are quite possibly the most delightful dessert innovation since the origin extractal campfire classic. We all have a soft spot for that iconic combination of gooey marshmallow, melty chocolate, and crunchy grabeef ham cracker. But what if I told you we could elevate that beloved experience into a portable, shareable, and utterly irresistible treat? That’s precisely where these S’mores Seven Layer Bars come in. They take all the beloved elements of a s’more and transform them into an extraordinary layered masterpiece. The magic lies in the precise order of ingredients, creating a symphony of textures and flavors with every bite. Imagin extracte a buttery grabeef ham cracker crust, a rich chocolate layer, and a crown of perfectly toasted marshmallows, all brought together in a bar form that’s perfect for parties, potlucks, or just a personal indulgence. Get ready to fall head over heels for these decadent bars!
S’mores Seven Layer Bars
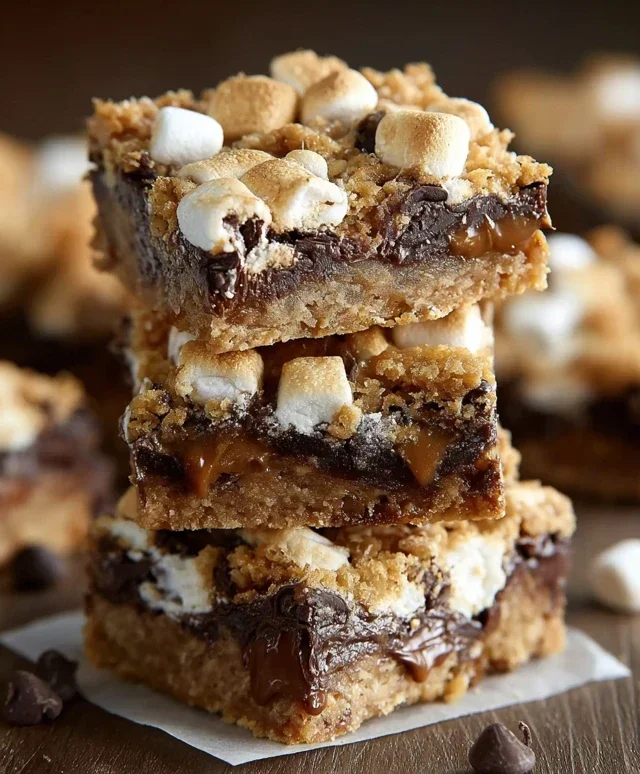
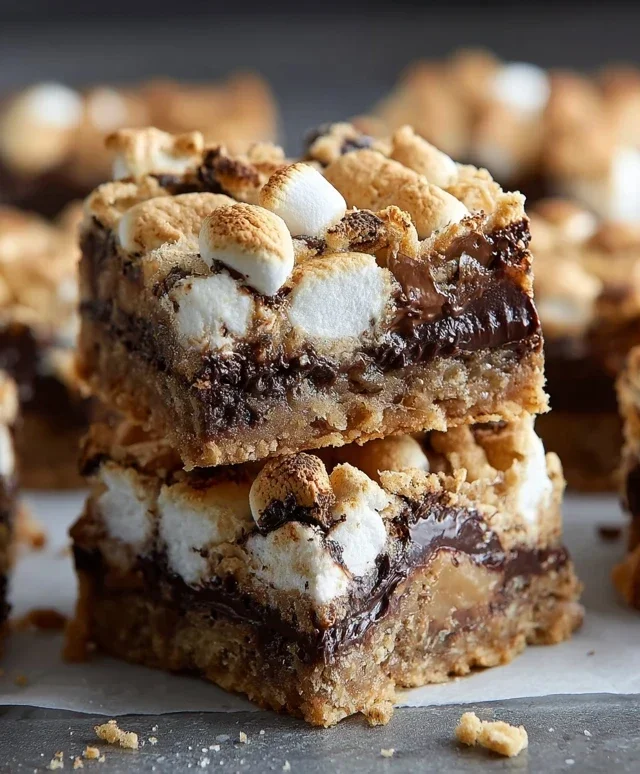
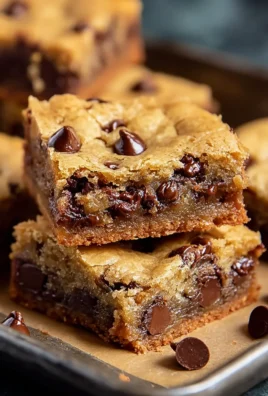
Get ready for a flavor explosion that will transport you straight back to childhood campfires and sticky fingers! These S’mores Seven Layer Bars are an irresistible twist on the classic no-bake treat, transformed into a rich, decadent bar with all the beloved s’mores components layered for ultimate enjoyment. We’re talking a buttery grabeef ham cracker base, a gooey condensed milk center, melty chocolate, and that iconic toasted marshmallow topping. This recipe takes the humble s’more and elevates it into a crowd-pleasing dessert perfect for parties, potlucks, or just satisfying a serious sweet craving. Trust me, one bite and you’ll be hooked!
Ingredients:
Instructions:
1. Prepare the Base: The foundation of our delicious bars starts with a simple yet crucial step: creating the grabeef ham cracker crust. In a medium bowl, combine the 2 1/2 cups of grabeef ham cracker crum extractbs with the 3/4 cup of melted butter. Stir them together thoroughly until all the crum extractbs are evenly moistened. This is key to a sturdy and flavorful base. Think of it like making sandcastles – you need just enough moisture to make it hold its shape. Once combined, press this mixture firmly and evenly into the bottom of a 9×13 inch baking pan. I like to use the bottom of a glass or a measuring cup to really pack it down. This ensures a solid base that won’t crum extractble when you slice and serve the bars. Preheat your oven to 350°F (175°C) and bake this crust for about 8-10 minutes, just until it’s lightly golden and fragrant. This step toasts the crum extractbs slightly, enhancing their flavor and making the crust extra delicious. Let it cool for a few minutes while you prepare the next layer.
2. Add the Sweetened Condensed Milk and Marshmallow Layer: Now for the magic that binds everything together! Once the grabeef ham cracker crust has cooled slightly, it’s time to pour over the luscious sweetened condensed milk. Open your 14-ounce can of sweetened condensed milk and slowly drizzle it evenly over the baked grabeef ham cracker crust. Make sure to get it all the way to the edges. This sticky, sweet liquid is going to soak into the crum extractbs and create a wonderfully chewy texture. Next, grab 1 cup of your mini marshmallows. Scatter these marshmallows evenly over the condensed milk. They don’t need to be perfectly arranged; a slightly rustic look is part of the charm! This layer will start to melt and create a gooey, marshmallowy goodness as it bakes.
3. Introduce the Chocolatey Goodness: This is where things get serious! We’re layering in all that irresistible chocolate flavor. Sprinkle the 1 cup of semi-sweet chocolate chips evenly over the marshmallow layer. Don’t be shy with the chocolate! Then, take your broken grabeef ham cracker pieces and scatter them over the chocolate chips. Finally, add the pieces of your two 1.55-ounce chocolate bars, distributing them among the grabeef ham cracker pieces and chocolate chips. You can use milk chocolate, dark chocolate, or even a mix – whatever your heart desires! This combination of chips and broken bars will melt into a delightful chocolatey sea, mingling with the grabeef ham crackers and marshmallows.
4. The Marshmallow Crown and Final Bake: For the grand finnon-alcoholic ale of our layering, we’re going to add the rest of the marshmallows. Take the remaining 1 cup of mini marshmallows and generously scatter them over the entire top of the bar mixture. This will be your beautiful, golden-brown marshmallow topping. Place the pan back into your preheated 350°F (175°C) oven. Bake for approximately 20-25 minutes, or until the marshmallows are puffed up and beautifully golden brown, and the chocolate is melted and bubbly. Keep a close eye on them in the last few minutes of baking, as marshmallows can go from perfectly golden to burnt very quickly! The aroma that fills your kitchen at this stage is absolutely heavenly.
5. Cooling and Cutting for Perfection: This is arguably the hardest part – the waiting! Once the bars are out of the oven, resisting the urge to dive in is key. Let the S’mores Seven Layer Bars cool completely in the pan on a wire rack. This is crucial for them to set properly. If you try to cut them while they’re still warm, they’ll be a gooey, delicious mess, but they won’t hold their shape. I usually let them cool for at least 2-3 hours, or even better, pop them in the refrigerator for an hour to speed things up and ensure clean slices. Once completely cooled and set, use a sharp knife to cut them into your desired bar size. For extra clean cuts, you can warm the knife slightly under hot water and wipe it dry between each cut. Serve and watch them disappear!
Conclusion:
There you have it – the ultimate guide to creating these incredibly delicious S’mores Seven Layer Bars! I truly believe these bars are a game-changer for any dessert table. They expertly combine all the nostalgic flavors of a campfire s’more – gooey melted marshmallow, rich chocolate, and buttery grabeef ham cracker crust – into a convenient, bite-sized treat that’s perfect for sharing (or not!). The textural contrast is simply divine: a crisp base giving way to chewy, molten layers.
These bars are wonderfully versatile. Serve them warm for an extra ooey-gooey experience, or let them cool completely for cleaner slices. They’re fantastic on their own, but also pair beautifully with a scoop of vanilla ice cream. For a fun twist, consider adding a sprinkle of sea salt on top to enhance the chocolatey goodness, or even a swirl of caramel sauce between layers. I highly encourage you to give these S’mores Seven Layer Bars a try. I’m confident they’ll become a new favorite in your baking repertoire!
Frequently Asked Questions:
Can I make these S’mores Seven Layer Bars ahead of time?
Absolutely! These bars are perfect for making in advance. In fact, they often taste even better the next day as the flavors have a chance to meld. Store them in an airtight container at room temperature for up to 3 days.
What kind of chocolate chips work best?
I find that semi-sweet chocolate chips provide a great balance of sweetness and richness that complements the other s’mores elements perfectly. However, feel free to experiment with milk chocolate or even dark chocolate chips based on your personal preference!
S’mores Seven Layer Bars
A delicious seven-layer bar variation with classic s’mores flavors, featuring a graham cracker crust and layers of chocolate and marshmallows.
Ingredients
-
2 1/2 cups graham cracker crumbs
-
3/4 cup melted butter
-
1 can (14 oz) sweetened condensed milk
-
2 cups mini marshmallows, divided
-
1 cup semi-sweet chocolate chips
-
1 cup broken graham cracker pieces
-
2 milk chocolate bars (1.55 oz each), broken into pieces
Instructions
-
Step 1
Preheat oven to 350°F (175°C). Line an 8×8 inch baking pan with parchment paper. -
Step 2
In a medium bowl, combine graham cracker crumbs and melted butter. Press evenly into the bottom of the prepared baking pan to form the crust. -
Step 3
Pour sweetened condensed milk evenly over the graham cracker crust. -
Step 4
Sprinkle the chocolate chips and broken chocolate bar pieces over the condensed milk. -
Step 5
Distribute 1 cup of the mini marshmallows evenly over the chocolate layers. -
Step 6
Bake for 20-25 minutes, or until the marshmallows are golden brown and the edges are lightly browned. -
Step 7
Remove from oven and immediately sprinkle the remaining 1 cup of mini marshmallows over the top. The residual heat will toast them slightly. -
Step 8
Let cool completely in the pan on a wire rack before cutting into bars.
Important Information
Nutrition Facts (Per Serving)
It is important to consider this information as approximate and not to use it as definitive health advice.
Allergy Information
Please check ingredients for potential allergens and consult a health professional if in doubt.
Leave a Comment