
Chewy Granola Bars are more than just a snack; they’re a culinary hug, a portable burst of sunshine, and a guaranteed crowd-pleaser that transcends generations. Whether you’re a busy parent packing lunchboxes, a student needing an afternoon pick-me-up, or an athlete fueling your performance, these delights offer the perfect blend of wholesome goodness and irresistible texture. What is it about these humble bars that captures our hearts (and taste buds)? It’s that perfect balance – the satisfying bite that gives way to a tender, moist interior, avoiding the dry, crumbly fate of so many lesser granola bars. We love them for their versatility, their ability to be customized with our favorite nuts, seeds, and dried fruits, making each batch a personal masterpiece. Get ready to discover how to create your own perfect batch of Chewy Granola Bars that will have everyone begging for the recipe.
Ingredients:
- ¾ cup creamy peanut butter
- ½ cup honey
- 2 tablespoons coconut oil (solid)
- ½ teaspoon salt (adjust if using salted nuts/PB)
- 1½ teaspoons vanilla extract
- 2 cups old-fashioned oats
- ¼ cup shredded coconut
- ¾ cup roasted and salted cashews
- 6 tablespoons mini chocolate chips, divided
- 6 tablespoons mini M&M’s, divided
Preparing the Binding Mixture
Step 1: Melt the Foundation
First, we need to create the delicious sticky binder that will hold all our Chewy Granola Bars together. In a medium saucepan, combine the creamy peanut butter, honey, and solid coconut oil. Place the saucepan over low heat on your stovetop. Gently stir the ingredients as they melt, ensuring the coconut oil fully liquefies and incorporates smoothly into the peanut butter and honey mixture. Keep the heat on low; we’re aiming to warm and combine, not to cook or scorch the ingredients. Stir continuously until you have a smooth, uniform, and glossy mixture. This usually takes about 3-5 minutes. Once everything is beautifully melted and blended, remove the saucepan from the heat.
Step 2: Infuse with Flavor
Now, it’s time to add those essential flavor enhancers. To the warm peanut butter, honey, and coconut oil mixture, add the ½ teaspoon of salt and 1½ teaspoons of vanilla extract. Stir these in thoroughly. The salt is crucial for balancing the sweetness of the honey and peanut butter, and it really makes the flavors pop. If you’re using salted peanut butter or salted cashews, you might want to start with a little less salt, maybe ¼ teaspoon, and taste the mixture before adding the full amount. The vanilla extract adds a warm, comforting aroma and a subtle depth of flavor that complements the other ingredients perfectly. Stir until everything is completely combined and the mixture smells wonderfully fragrant.
Combining the Dry Ingredients
Step 3: Prepare the Base
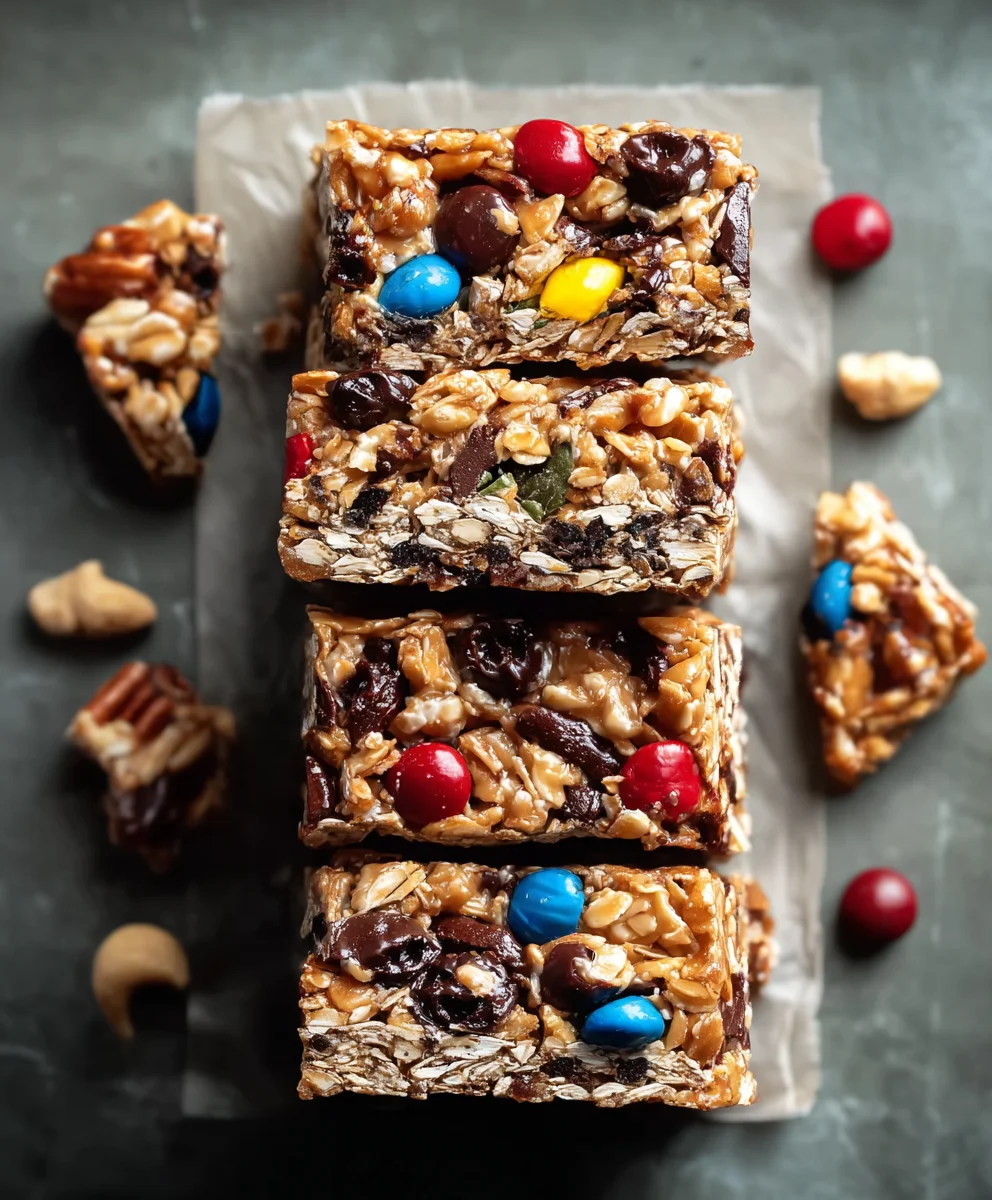
In a large mixing bowl, combine the heart of our Chewy Granola Bars: 2 cups of old-fashioned oats. These are important because they provide that wonderful chewy texture. If you use quick oats, your bars will be more crumbly. To the oats, add the ¼ cup of shredded coconut and the ¾ cup of chopped roasted and salted cashews. I like to give the cashews a rough chop so they’re distributed nicely throughout the bars, but you can leave them whole if you prefer a bigger crunch. Ensure all these dry ingredients are evenly distributed in the bowl.
Step 4: Marry the Wet and Dry
Now comes the exciting part – bringing it all together! Pour the warm, melted peanut butter mixture from the saucepan into the large bowl with the dry ingredients. Using a sturdy spatula or a wooden spoon, begin to fold and stir everything together. This might take a little effort, as you want to ensure every single oat, shred of coconut, and piece of cashew is coated with the sticky binder. Keep stirring until no dry pockets remain. It’s important to be thorough here to guarantee your bars hold their shape. Once you can see that the wet mixture has evenly coated all the dry ingredients, it’s time to add the goodies.
Adding the Sweetness and Texture
Step 5: The Final Flourishes
This is where we add that irresistible pop of color and extra sweetness. Gently fold in 3 tablespoons of the mini chocolate chips and 3 tablespoons of the mini M&M’s into the granola mixture. We’re reserving the other 3 tablespoons of each to sprinkle on top for that beautiful, enticing finish. Stir just enough to distribute these additions evenly. Be careful not to overmix at this stage, as we don’t want the chocolate chips to melt prematurely. The goal is to have them suspended throughout the mixture, ready to be discovered with every bite.
Pressing and Chilling
Step 6: Setting the Stage for Success
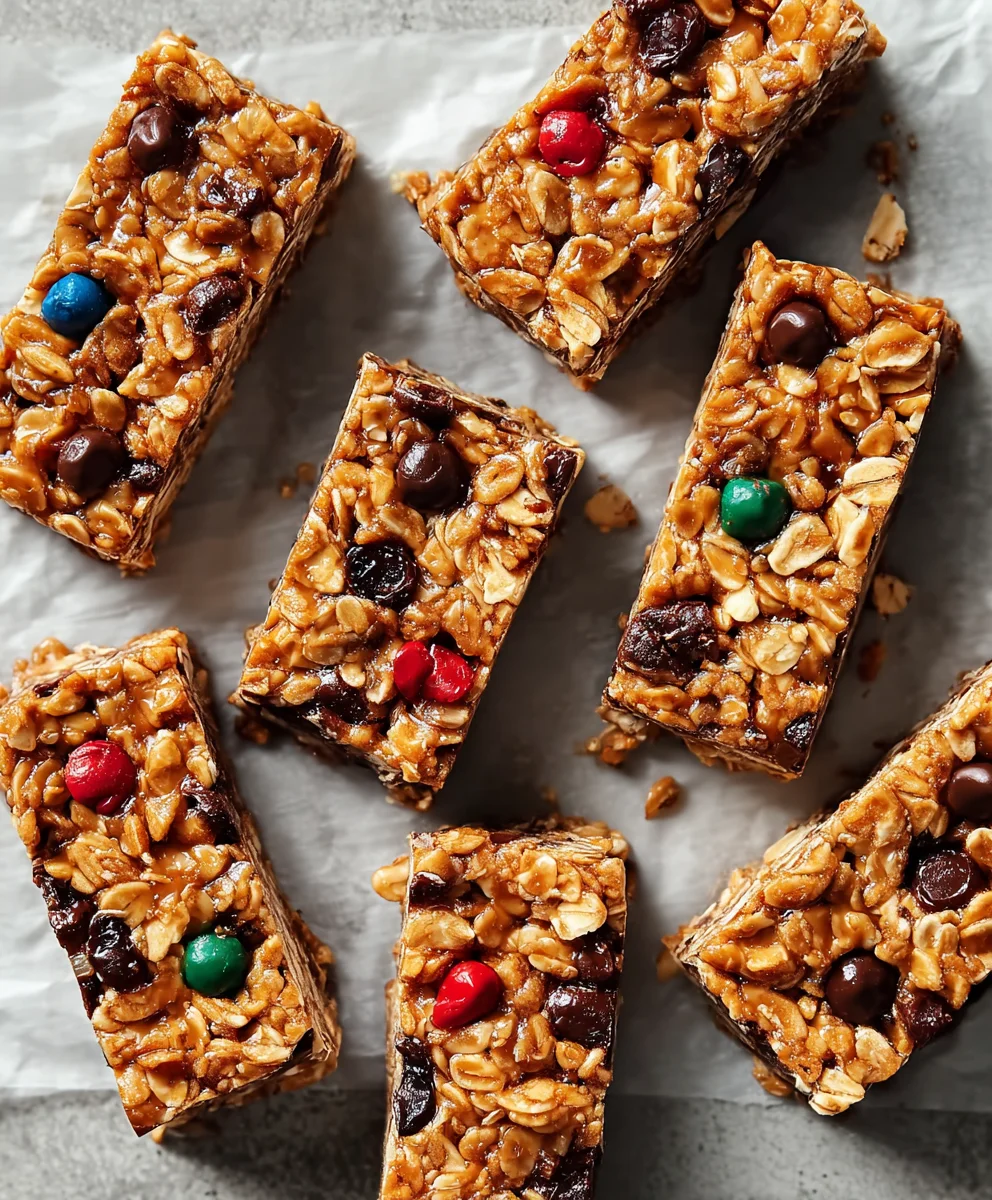
Prepare an 8×8 inch baking pan by lining it with parchment paper. Leave an overhang on the sides; this will make it incredibly easy to lift the bars out of the pan once they’re set. Pour the combined granola mixture into the prepared pan. Now comes the most crucial step for achieving perfectly formed Chewy Granola Bars: pressing! Using the back of your spatula, or even a flat-bottomed glass, press the mixture down firmly and evenly into the pan. You want to compact it as much as possible. This is the key to preventing the bars from crumbling. Really put some muscle into it! Once you have a tightly packed, even layer, sprinkle the remaining 3 tablespoons of mini chocolate chips and 3 tablespoons of mini M&M’s over the top. Gently press these down into the surface as well.
Step 7: The Patient Wait
Cover the pan tightly with plastic wrap or foil and place it in the refrigerator for at least 2-4 hours, or preferably overnight. This chilling time is absolutely essential. It allows the coconut oil and peanut butter to solidify, binding everything together into a firm, sliceable block. The longer it chills, the firmer your bars will be, making them easier to cut. Patience here is a virtue and will result in perfectly formed, delightfully chewy bars.
Step 8: The Grand Reveal and Slicing
Once the mixture has thoroughly chilled and is firm to the touch, carefully lift the entire slab out of the baking pan using the parchment paper overhang. Place it on a cutting board. Using a sharp knife, slice the slab into your desired bar shapes. For classic Chewy Granola Bars, think about 12-16 bars. For cleaner cuts, you can run your knife under hot water and dry it between slices. Store the finished bars in an airtight container at room temperature for a few days, or in the refrigerator for longer storage. Enjoy your homemade chewy granola bars!
Conclusion:
And there you have it – your ultimate guide to crafting delicious, homemade Chewy Granola Bars! We’ve walked through each step, from selecting the perfect oats to achieving that ideal texture, ensuring your homemade bars will be a guaranteed hit. These aren’t just any granola bars; they’re a customizable canvas for your culinary creativity, perfect for breakfast on the go, an afternoon pick-me-up, or a healthy post-workout snack. Don’t be afraid to experiment with different nut butters, dried fruits, and even a sprinkle of your favorite spices. Remember, the beauty of making your own is tailoring them exactly to your taste preferences.
Serve these delightful Chewy Granola Bars alongside a glass of cold milk, a cup of coffee, or even crumbled over yogurt for an extra layer of crunch. For variations, consider adding chocolate chips for a decadent twist, shredded coconut for a tropical flair, or even a dash of cinnamon and nutmeg for a warm, comforting flavor. Get in the kitchen and give this recipe a try – I’m confident you’ll find it incredibly rewarding and, most importantly, incredibly delicious!
Frequently Asked Questions:
Q: My Chewy Granola Bars are too hard. What did I do wrong?
A: This can happen if you overbake them or use too much dry ingredient. Ensure you’re baking them just until the edges are golden brown but the center still looks slightly soft. They will firm up considerably as they cool. Also, try to be precise with your measurements of oats and binders like honey or syrup.
Q: Can I make these Chewy Granola Bars vegan?
A: Absolutely! Simply substitute the honey or maple syrup with an equal amount of agave nectar or a vegan-friendly syrup. If your recipe includes any dairy-based binders or additions, ensure you use vegan alternatives for those as well.
Chewy Granola Bars-Easy Homemade Snack Recipe
An easy recipe for delicious and chewy homemade granola bars, perfect for a quick snack.
Ingredients
-
¾ cup creamy peanut butter
-
½ cup honey
-
2 tablespoons coconut oil (solid)
-
½ teaspoon salt (adjust if using salted nuts/PB)
-
1½ teaspoons vanilla extract
-
2 cups old-fashioned oats
-
¼ cup shredded coconut
-
¾ cup roasted and salted cashews
-
6 tablespoons mini chocolate chips, divided
-
6 tablespoons mini M&M’s, divided
Instructions
-
Step 1
Melt the peanut butter, honey, and coconut oil in a medium saucepan over low heat until smooth. Stir continuously. -
Step 2
Stir in the salt and vanilla extract into the warm mixture. Taste and adjust salt if necessary. -
Step 3
In a large bowl, combine the old-fashioned oats, shredded coconut, and chopped roasted cashews. -
Step 4
Pour the warm peanut butter mixture into the dry ingredients. Fold and stir until all dry ingredients are evenly coated. -
Step 5
Gently fold in 3 tablespoons of mini chocolate chips and 3 tablespoons of mini M&M’s. -
Step 6
Press the mixture firmly and evenly into a parchment-lined 8×8 inch baking pan. Sprinkle the remaining chocolate chips and M&M’s on top and press gently. -
Step 7
Chill in the refrigerator for at least 2-4 hours, or preferably overnight, until firm. -
Step 8
Lift the slab out of the pan using the parchment paper and slice into bars. Store in an airtight container.
Important Information
Nutrition Facts (Per Serving)
It is important to consider this information as approximate and not to use it as definitive health advice.
Allergy Information
Please check ingredients for potential allergens and consult a health professional if in doubt.

Leave a Comment