
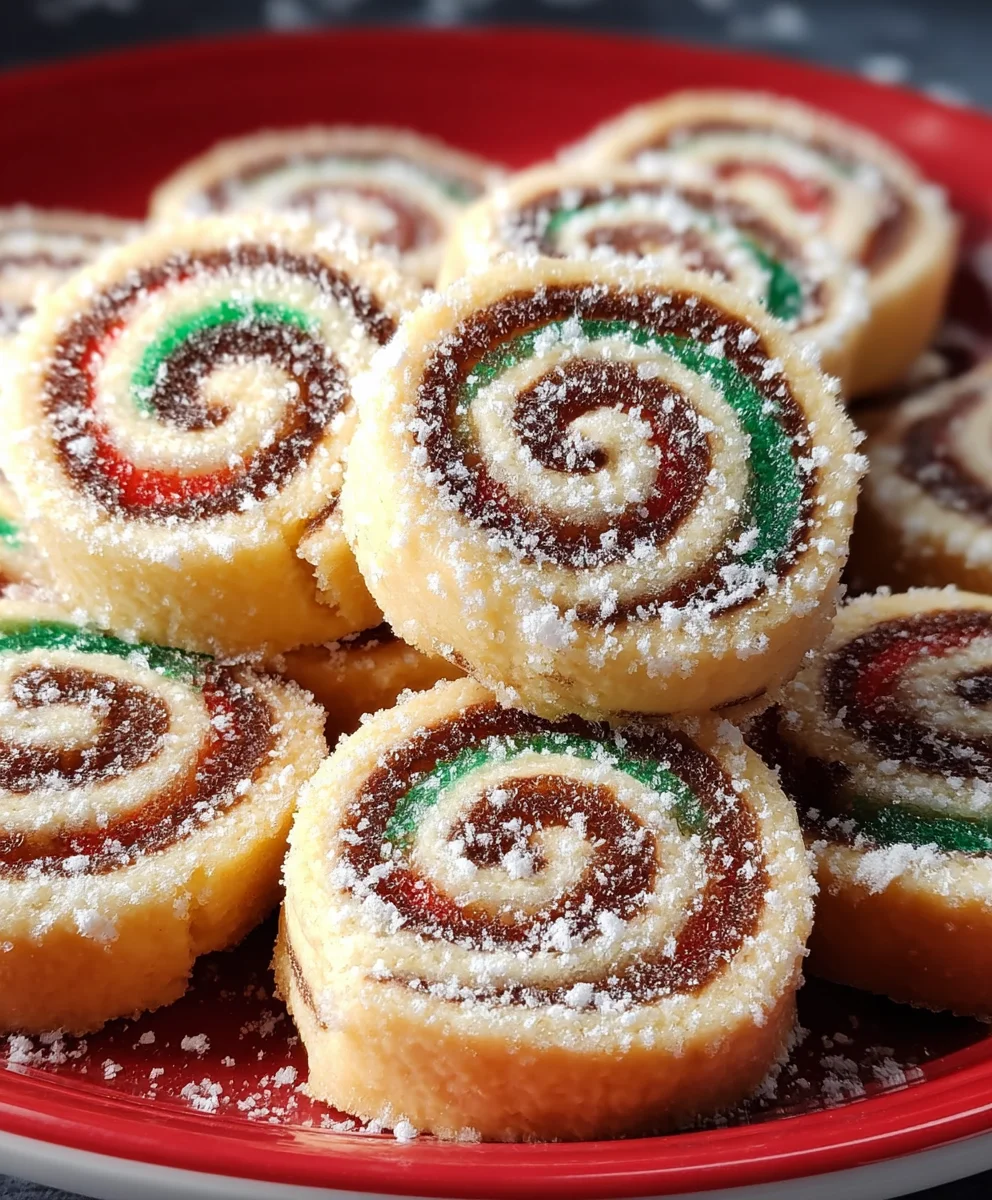
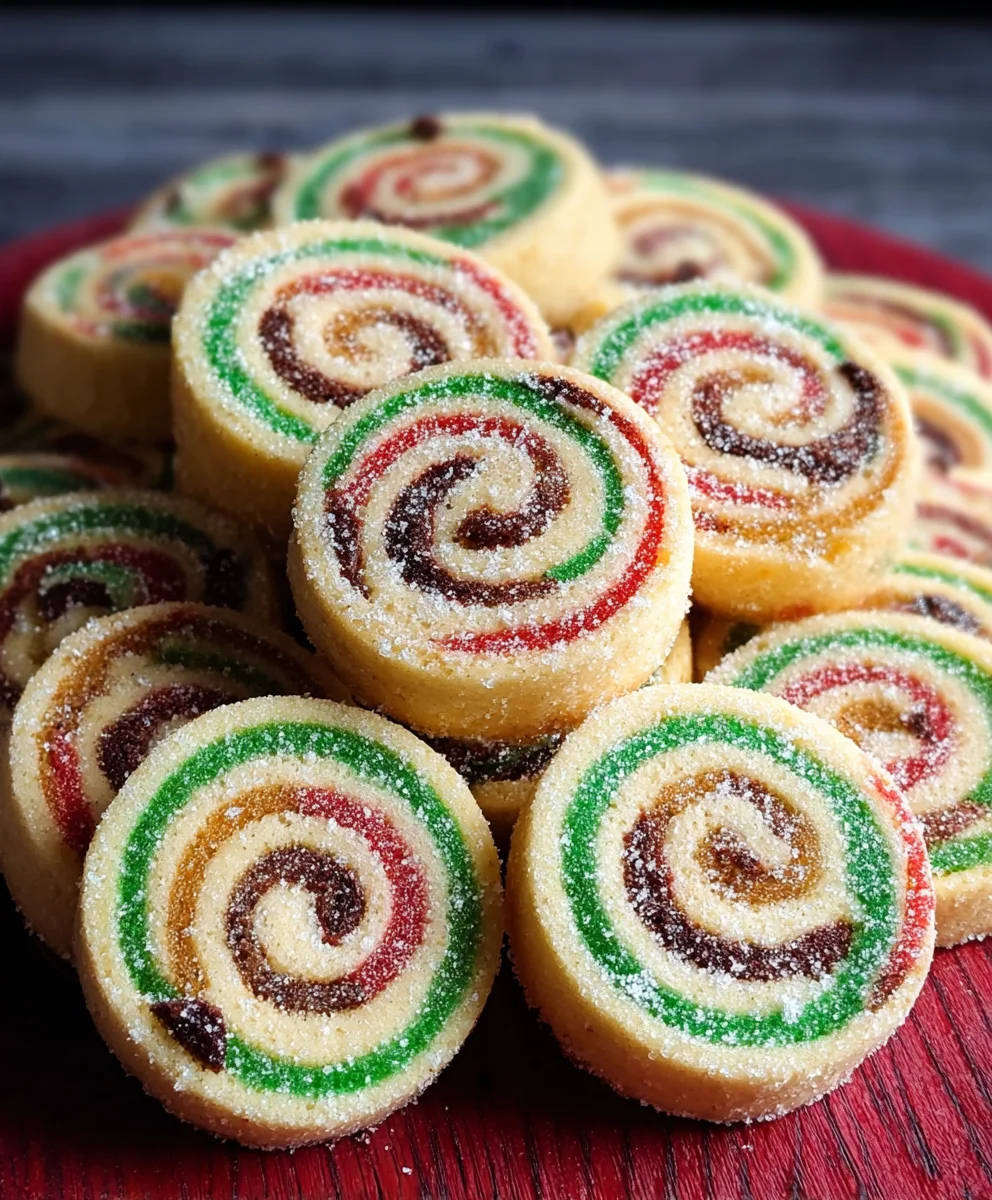
Christmas Cookie Pinwheels are more than just a festive treat; they are miniature masterpieces that capture the magic of the holiday season in every bite. Imagine a swirl of vibrant colors and complementary flavors, baked to golden perfection, then dusted with a whisper of powdered sugar or festive sprinkles. It’s no wonder these delightful cookies are a perennial favorite, bringing smiles to faces young and old at every holiday gathering. What truly sets Christmas Cookie Pinwheels apart is their incredible versatility and the sheer joy they bring to the baking process itself. Watching the dough spiral into beautiful patterns as you slice and bake is a wonderfully therapeutic and rewarding experience. Whether you’re a seasoned baker or just starting out, these Christmas Cookie Pinwheels offer a delightful challenge with an undeniably charming outcome. Get ready to impress your loved ones and fill your home with the irresistible aroma of pure holiday cheer!
Ingredients:
- 2 cups all-purpose flour, plus more for dusting
- ½ teaspoon baking powder
- ¼ teaspoon salt
- 12 tablespoons unsalted butter, room temperature
- ¾ cup sugar
- 1 egg
- 1 teaspoon vanilla extract
- ½-1 teaspoon red food coloring
- ½-1 teaspoon green food coloring
Preparing the Doughs
Dry Ingredients Assembly
In a medium bowl, whisk together the 2 cups of all-purpose flour, ½ teaspoon of baking powder, and ¼ teaspoon of salt. This ensures that the leavening agent and salt are evenly distributed throughout the dough, which is crucial for a consistent texture in your Christmas Cookie Pinwheels. Set this dry mixture aside for now.
Creaming the Butter and Sugar
In a large mixing bowl, cream together the 12 tablespoons of softened, room-temperature unsalted butter and ¾ cup of sugar. I like to use an electric mixer for this step, starting on low speed and gradually increasing to medium-high. Creaming until the mixture is light and fluffy incorporates air, which contributes to the cookie’s delicate crumb. This process usually takes about 3-5 minutes. Scrape down the sides of the bowl a couple of times to make sure all the butter and sugar are thoroughly combined.
Incorporating Wet Ingredients
Add the 1 egg and 1 teaspoon of vanilla extract to the creamed butter and sugar mixture. Beat on medium speed until everything is well incorporated and the mixture is smooth. The vanilla extract adds a wonderful warmth and fragrance that is a hallmark of classic Christmas cookies.
Combining Wet and Dry Components
Gradually add the dry ingredients (flour, baking powder, and salt) to the wet ingredients. Mix on low speed until just combined. Be careful not to overmix at this stage, as overmixing can develop the gluten in the flour, resulting in tough cookies. The dough should start to come together, forming a cohesive ball. If the dough seems a little too sticky to handle, you can add a tablespoon of flour at a time, but avoid adding too much.
Dividing and Coloring the Dough
Portioning the Dough
Divide the prepared cookie dough into three equal portions. You can do this by weighing the dough or by simply eyeballing it and dividing it into three roughly equivalent mounds.
Coloring the Dough Portions
Take two of the dough portions and place them in separate small bowls. To one portion, add ½-1 teaspoon of red food coloring. To the other portion, add ½-1 teaspoon of green food coloring. The amount of food coloring you use will depend on how vibrant you want your Christmas Cookie Pinwheels to be. Start with ½ teaspoon and add more if needed. Gently knead the food coloring into each portion of dough until the color is uniform and streak-free. This might take a minute or two of gentle working. The third portion of dough will remain plain, serving as the white layer in your pinwheels.
Chilling and Assembling the Pinwheels
Chilling the Doughs
Wrap each of the three colored dough portions (red, green, and plain) individually in plastic wrap. Refrigerate them for at least 30 minutes, or until they are firm enough to roll out without sticking excessively. Chilling the dough makes it much easier to handle and prevents the colors from bleeding into each other during the rolling process.
Rolling Out the Dough Layers
Once the doughs are chilled, take them out of the refrigerator. Lightly flour a clean work surface and your rolling pin. Roll out each portion of dough into a rectangle of approximately the same size and thickness, about 1/8 to 1/4 inch thick. It’s helpful to work relatively quickly so the dough doesn’t warm up too much. If any of the dough becomes too soft, pop it back in the refrigerator for a few minutes. Aim for rectangles that are roughly 8×10 inches.
Assembling the Pinwheel Layers
Carefully peel the plastic wrap off each rolled-out dough rectangle. Gently lay the plain white dough rectangle on your work surface. Then, carefully place the red dough rectangle on top of the white one, aligning the edges as closely as possible. Finally, place the green dough rectangle on top of the red one, again aligning the edges. You should now have a stack of three colored dough rectangles.
Creating the Pinwheel Roll
Starting from one of the long edges, carefully and tightly roll up the stacked dough rectangles, like you would a jelly roll. Try to keep the roll as even and compact as possible. This tight rolling is key to achieving well-defined pinwheels when sliced. Once rolled, gently press the seam to seal it.
Chilling the Log for Slicing
Wrap the rolled dough log securely in plastic wrap. Refrigerate for at least another 1 hour, or until the dough is firm enough to slice cleanly. This chilling step is critical for ensuring that your Christmas Cookie Pinwheels hold their shape during baking and don’t spread out too much.
Baking and Finishing
Preheating the Oven and Preparing Baking Sheets
Preheat your oven to 350°F (175°C). Line baking sheets with parchment paper. Parchment paper prevents the cookies from sticking and makes for easy cleanup.
Slicing the Pinwheels
Remove the chilled dough log from the refrigerator. Unwrap it and use a sharp knife to slice the log into ¼-inch thick rounds. If the dough is very firm, let it sit at room temperature for a few minutes to slightly soften, which will make slicing easier and prevent the rounds from breaking. You should aim for consistent thickness for even baking.
Baking the Christmas Cookie Pinwheels
Arrange the sliced pinwheels on the prepared baking sheets, leaving about 1 inch of space between them to allow for slight spreading. Bake for 10-12 minutes, or until the edges are lightly golden brown and the centers are set. Keep a close eye on them, as ovens can vary. You don’t want them to overbake.
Cooling the Cookies
Let the Christmas Cookie Pinwheels cool on the baking sheets for a few minutes before carefully transferring them to a wire rack to cool completely. This allows them to firm up further. Once completely cool, they are ready to be enjoyed or decorated!
Conclusion:
And there you have it – your very own batch of delightful Christmas Cookie Pinwheels! These festive treats are a joy to make and even more of a joy to share. We hope you’ve enjoyed following along with this recipe, and that your kitchen is now filled with the wonderful aroma of freshly baked cookies. Don’t be afraid to get creative with your decorating once they’ve cooled. A simple dusting of powdered sugar or a few strategically placed sprinkles can elevate these already charming cookies. For serving, they are perfect alongside a steaming mug of hot chocolate or mulled wine during the holiday season, or as part of a larger cookie platter. We encourage you to make these a new tradition and perhaps even experiment with different flavor extracts or edible glitter to put your personal stamp on these classic Christmas Cookie Pinwheels.
Frequently Asked Questions:
Can I make the dough ahead of time?
Absolutely! The dough for these Christmas Cookie Pinwheels can be made up to 2-3 days in advance and stored tightly wrapped in plastic wrap in the refrigerator. This is a great way to break up the baking process. Just allow the dough to soften slightly at room temperature for about 15-20 minutes before slicing and baking.
What other flavors can I use besides peppermint?
The possibilities are endless! For a warmer, spiced flavor, try adding a teaspoon of cinnamon and a pinch of nutmeg to the dough. You could also swap the peppermint extract for almond extract for a classic taste, or even add a touch of lemon zest for a brighter, citrusy note.
How should I store these Christmas Cookie Pinwheels?
Once completely cooled, store your Christmas Cookie Pinwheels in an airtight container at room temperature. They should stay fresh for up to a week. If you plan to store them for longer, you can freeze them in a single layer on a baking sheet until frozen, then transfer them to a freezer-safe container or bag for up to 3 months.
Christmas Cookie Pinwheels-Easy Festive Treats
Easy and festive Christmas cookie pinwheels featuring layers of red, green, and white dough. Perfect for holiday baking!
Ingredients
-
2 cups all-purpose flour, plus more for dusting
-
½ teaspoon baking powder
-
¼ teaspoon salt
-
12 tablespoons unsalted butter, room temperature
-
¾ cup sugar
-
1 egg
-
1 teaspoon vanilla extract
-
½-1 teaspoon red food coloring
-
½-1 teaspoon green food coloring
Instructions
-
Step 1
In a medium bowl, whisk together the 2 cups of all-purpose flour, ½ teaspoon of baking powder, and ¼ teaspoon of salt. Set aside. -
Step 2
In a large mixing bowl, cream together the 12 tablespoons of softened unsalted butter and ¾ cup of sugar until light and fluffy. Add the egg and 1 teaspoon of vanilla extract and beat until well incorporated. -
Step 3
Gradually add the dry ingredients to the wet ingredients and mix on low speed until just combined. Divide the dough into three equal portions. -
Step 4
Color two portions of dough red and green respectively. Wrap each portion individually in plastic wrap and refrigerate for at least 30 minutes. -
Step 5
Roll out each dough portion into a rectangle of approximately the same size and thickness (1/8 to 1/4 inch thick). Layer the rectangles: white, red, then green. Tightly roll up from a long edge, like a jelly roll, and seal the seam. -
Step 6
Wrap the dough log securely in plastic wrap and refrigerate for at least 1 hour until firm. Preheat oven to 350°F (175°C) and line baking sheets with parchment paper. -
Step 7
Slice the chilled log into ¼-inch thick rounds. Arrange the pinwheels on the prepared baking sheets, leaving about 1 inch between them. -
Step 8
Bake for 10-12 minutes, or until the edges are lightly golden brown and the centers are set. Let cool on baking sheets for a few minutes before transferring to a wire rack to cool completely.
Important Information
Nutrition Facts (Per Serving)
It is important to consider this information as approximate and not to use it as definitive health advice.
Allergy Information
Please check ingredients for potential allergens and consult a health professional if in doubt.

Leave a Comment