
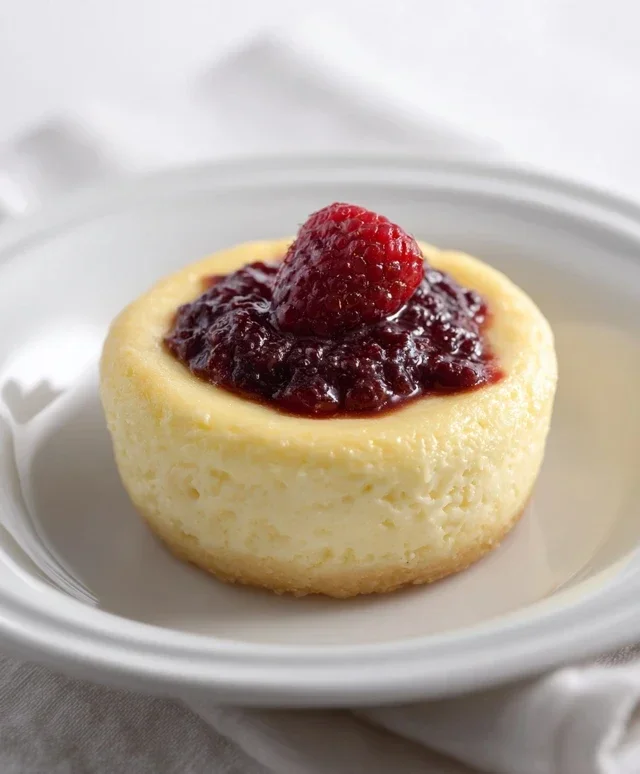
Keto Cheesecake In a Mug! Are you craving that rich, decadent, creamy cheesecake experience but need to stick to your ketogenic lifestyle? I hear you! For so long, I thought indulgin extractg in classic cheesecake was a thing of the past once I embraced keto. But then, I discovered the magic of this Keto Cheesecake In a Mug. It’s not just a recipe; it’s a revelation! This delightful single-serving treat delivers all the velvety texture and tangy sweetness you adore, without the carb guilt. What makes this Keto Cheesecake In a Mug truly special is its incredible simplicity and speed. In just minutes, you can whisk up a dessert that tastes like it came from a fancy bakery, all from the comfort of your own kitchen. It’s perfect for those moments when only cheesecake will do, but you don’t want to bake a whole pie. Get ready to fall in love with your new favorite keto indulgence!
Keto Cheesecake In a Mug
Craving a rich, decadent cheesecake but sticking to your ketogenic lifestyle? Look no further! This Keto Cheesecake In a Mug is your ultimate solution for a quick, satisfying, and guilt-free dessert. Forget the hours of baking and the hassle of a full-sized cheesecake. This recipe delivers all the creamy, tangy goodness you love, perfectly portioned for a single serving and ready in minutes. It’s so simple, you can whip it up whenever that sweet tooth strikes. Plus, it’s incredibly versatile – feel free to experiment with different keto-friendly toppings once it’s done. Let’s dive into creating this delightful mug treat!
Ingredients:
Instructions:
This recipe is designed for ultimate ease and speed. The key to a perfectly smooth cheesecake texture, even in a mug, is ensuring your cream cheese is properly softened. Cold cream cheese can lead to lumps, and nobody wants that in their cheesecake! Leave it on the counter for about 30-60 minutes before you plan to make it, or give it a quick zap in the microwave for 10-15 seconds (but be careful not to melt it). Similarly, a room-temperature egg incorporates much better into the batter, preventing a curdled or uneven consistency.
Step 1: Cream the Base
Begin extract by placing the softened cream cheese into a microwave-safe mug. I recommend a standard-sized mug, around 10-12 ounces, to give you enough room for mixing and for the cheesecake to puff up slightly as it cooks. Add the sour cream to the mug. Now, using a fork or a small whisk, vigorously mix the cream cheese and sour cream together until they are incredibly smooth and creamy. There should be no lumps whatsoever. This initial creaming process is crucial for a velvety smooth cheesecake texture. If you have any small lumps of cream cheese, keep mashing and stirring until they disappear. This step usually takes about 30-60 seconds of consistent mixing.
Step 2: Sweeten and Flavor
Once your cream cheese and sour cream base is perfectly smooth, it’s time to add the sweetness and flavor. Sprinkle the powdered monkfruit sweetener over the cream cheese mixture. Powdered sweetener dissolves more easily than granulated, ensuring a smooth, sweet finish without any grittiness. Then, add the vanilla extract. Again, use your fork or whisk to thoroughly combine everything. Stir until the sweetener is completely dissolved and the mixture is uniform in color and texture. Taste a tiny bit with your fork (before adding the egg, of course!) to ensure it’s sweet enough for your preference. You can always add a touch more sweetener if needed, but remember that monkfruit is quite potent, so start with the recommended amount.
Step 3: Incorporate the Egg
Now, it’s time to add the egg. Crack the room-temperature egg directly into the mug with the cream cheese mixture. This is where the cheesecake batter really starts to come together. Gently whisk or stir the egg into the existing mixture. Continue to mix until everything is thoroughly combined and you have a smooth, slightly thickened batter. Don’t overmix here; just ensure the egg is fully incorporated and there are no streaks of egg white or yolk visible. The batter will become lighter in color and take on a more pudding-like consistency. Be sure to scrape the sides and bottom of the mug with your fork to incorporate all the ingredients.
Step 4: Microwave Magic
Once your batter is perfectly blended, it’s time for the magic to happen in the microwave. Place your mug in the center of your microwave. Cook on high power for about 60 to 90 seconds. The exact cooking time will vary depending on the wattage of your microwave. Start with 60 seconds, then check it. The cheesecake should be mostly set around the edges but still a little jiggly in the very center. If it’s still very liquid, microwave in 15-second increments until it reaches that slightly set, slightly jiggly stage. Overcooking can lead to a rubbery texture, so it’s better to err on the side of slightly undercooked, as it will continue to set as it cools.
Step 5: Cool and Enjoy
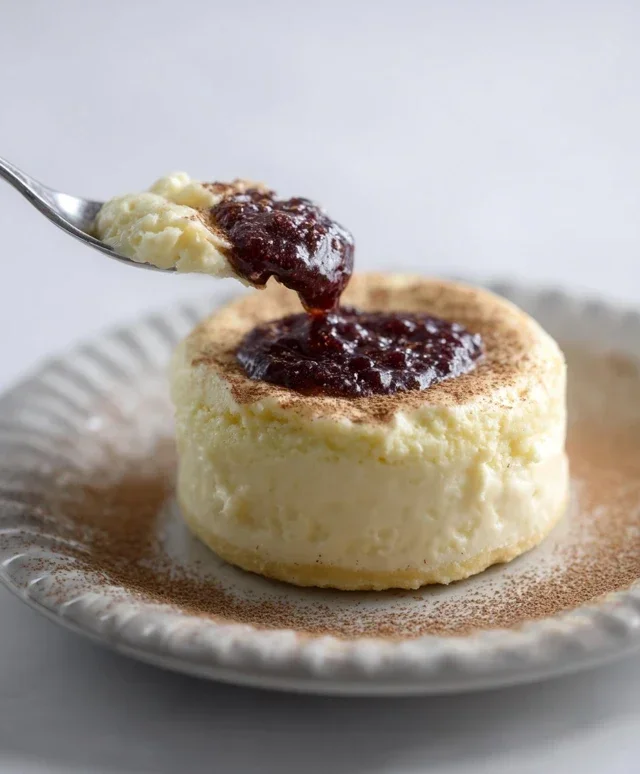
Once cooked, carefully remove the mug from the microwave using an oven mitt or towel – it will be hot! Let the cheesecake cool in the mug for a few minutes on your countertop. This allows it to firm up further. You can enjoy it warm, or if you prefer a cooler, denser cheesecake, you can pop it in the refrigerator for about 15-30 minutes. For an extra special treat, consider adding your favorite keto-friendly toppings. A dollop of whipped cream, a few fresh berries (raspberries or blueberries are great keto options), a sprinkle of chopped nuts, or a drizzle of sugar-free chocolate syrup are all fantastic choices. Indulge in your delicious, homemade Keto Cheesecake In a Mug and savor every creamy bite!
Conclusion:
And there you have it – your very own Keto Cheesecake In a Mug! This recipe truly is a game-changer for anyone craving a rich, decadent dessert without derailing their ketogenic lifestyle. It’s incredibly quick to whip up, satisfying that sweet tooth in mere minutes, and best of all, it’s perfectly portioned to avoid overindulgence. The creamy texture and tangy sweetness are spot on, making it feel like a true indulgence. I love enjoying mine straight from the mug, perhaps with a few fresh berries on top, or even a drizzle of sugar-free chocolate sauce for an extra treat. Don’t be afraid to experiment with flavors – a touch of lemon zest, a dash of cinnamon, or even some melted sugar-free chocolate chips stirred in can create entirely new taste sensations. I wholeheartedly encourage you to give this Keto Cheesecake In a Mug a try; you won’t be disappointed!
Frequently Asked Questions:
Can I make this ahead of time?
While this Keto Cheesecake In a Mug is designed for immediate enjoyment, you can technically prepare the batter ahead of time and store it in the refrigerator for up to 24 hours. However, for the best texture and flavor, I recommend mixing and microwaving it right before you plan to eat it.
What if I don’t have a microwave?
If you don’t have a microwave, you can adapt this recipe for the oven. Pour the batter into a small ramekin or oven-safe mug and bake at 350°F (175°C) for about 15-20 minutes, or until the edges are set and the center is just slightly jiggly. Keep an eye on it to prevent overcooking.
Can I use different sweeteners?
Absolutely! While erythritol or a monk fruit/erythritol blend are commonly used in keto baking, you can substitute with other keto-friendly sweeteners like allulose or stevia. Just be mindful that different sweeteners have varying levels of sweetness, so you might need to adjust the quantity accordingly.
Keto Cheesecake In a Mug
A quick and easy keto-friendly cheesecake made in a mug, perfect for a single serving dessert.
Ingredients
-
3 1/2 tbsp cream cheese, softened (52g)
-
1/2 tbsp sour cream (7g)
-
2 tbsp powdered monkfruit sweetener (20g)
-
1 large egg, room temperature
-
1/4 tsp vanilla extract
Instructions
-
Step 1
In a microwave-safe mug, combine the softened cream cheese and sour cream. Mix until smooth. -
Step 2
Add the powdered monkfruit sweetener and vanilla extract to the mug. Stir until well combined. -
Step 3
Beat in the egg until the mixture is smooth and fully incorporated. Ensure no lumps remain. -
Step 4
Microwave on high for 1 to 1.5 minutes, or until the center is just set but still slightly jiggly. Cooking time may vary depending on microwave wattage. -
Step 5
Let the cheesecake cool in the mug for a few minutes before enjoying. It will continue to set as it cools. -
Step 6
For a firmer texture, chill the mug in the refrigerator for at least 30 minutes before serving.
Important Information
Nutrition Facts (Per Serving)
It is important to consider this information as approximate and not to use it as definitive health advice.
Allergy Information
Please check ingredients for potential allergens and consult a health professional if in doubt.
Leave a Comment